How to Set Up Your MIG Welder for Aluminium
June 30, 2023
Aluminium is softer than mild and stainless steel, making it a lot fiddlier to work with. Even though your MIG machine can weld aluminium, a few extra steps need to be taken so you won’t run into any issues like birdnesting.
We’ve made a step-by-step guide on everything you need to set up your MIG welder for a seamless aluminium weld.
Before you start welding aluminium
Aluminium is a considerably different metal compared to mild steel, which is why welding it can be more difficult. Some of its properties pose a direct challenge, including its softness, its thermal conductivity and its melting temperature, to name a few.
Aluminium is highly thermally conductive. That means it is very good at drawing heat away from the weld pool and does so faster than mild steel. It can be hard to maintain a weld pool and get proper penetration in your joint without distorting the metal or blowing straight through on thinner pieces.
Its high thermal conductance also makes starting a weld difficult, as your metal is usually at its coldest (unless you’ve preheated it).
As well as being more thermally conductive, aluminium’s melting temperature is 660°C, compared to mild steel’s 1350°C-1530°C. While its melting point might be less than half of steel’s, aluminium has an oxide layer that needs to be penetrated. The oxide layer has a melting point of 2000°C, which is what causes the problem.
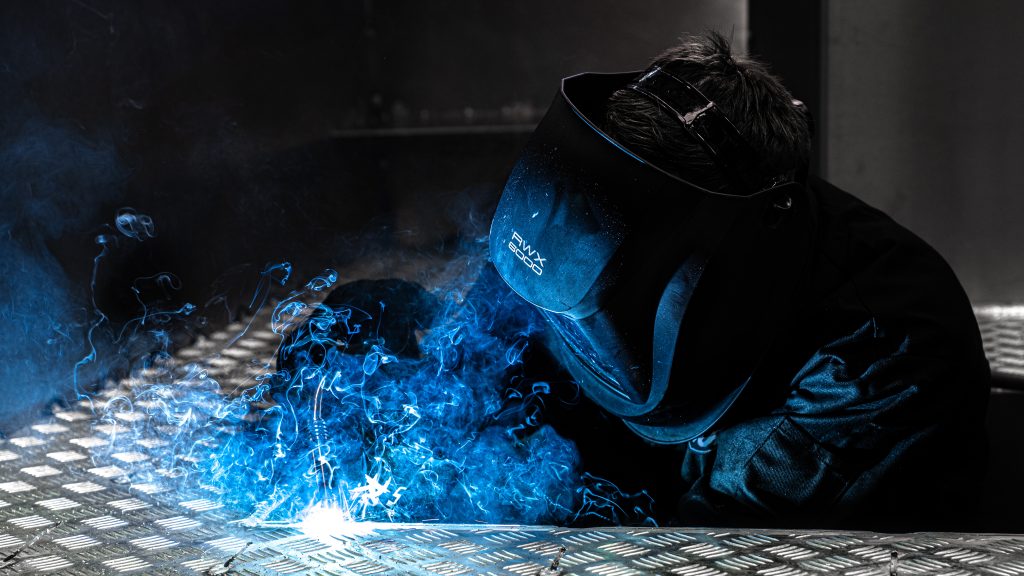
Igniting an arc and producing a weld bead that doesn’t look too bad at the start takes some practice.
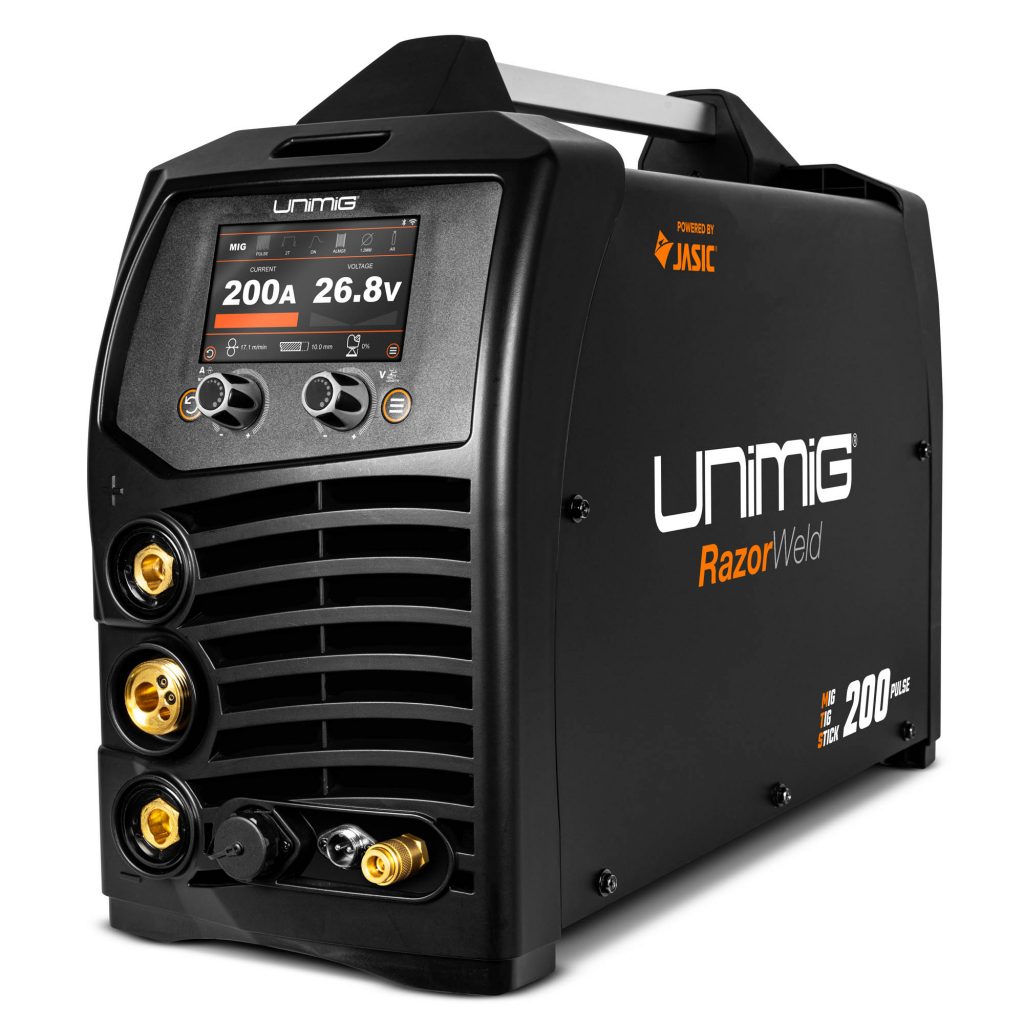
The best way to MIG weld aluminium is with a pulse MIG welder, like the RAZOR 200 PULSE. Pulse welding and features like start current or hot start, start slope, end current and end slope all give you more control over your arc and the heat input. The added control helps with starting a weld on cold metal and reduces defects like craters at the end. Pulse welding also almost completely eliminates spatter.
Unfortunately, pulse MIG machines are often more expensive and require more experience to master. Fortunately, you don’t need a pulse MIG machine to produce a good aluminium weld with your MIG welder.
With the right setup and technique, you can weld aluminium with a standard run-of-the-mill MIG welder. These days, almost all MIG welders are inverter machines, especially single-phase machines, so they’re much easier to use and better at welding aluminium than the older transformers.
The only limitation you’ll run into when MIG welding aluminium is the metal’s thickness. The thinnest most MIG welders can successfully weld is roughly 2mm. Anything thinner, and you’ll need to look at getting a pulse MIG or an AC/DC TIG welder with pulse capabilities.
Do you need a spool gun to MIG weld aluminium?
The short answer is no. If you don’t have (or don’t want) a spool gun, you can still MIG weld aluminium. While a spool gun is designed to make the whole process easier, your MIG welder and the standard torch it comes with are just as capable of getting the job done.
Spool guns can speed up your set up time and reduce the distance your wire needs to travel, but they also have their downsides. They’re bulkier and heavier, which makes them more uncomfortable for extended periods. They can also only be loaded with 0.5kg aluminium spools, so you’ll need to swap spools often if you’re doing a lot of welding.
Do you need AC to MIG weld aluminium?
No, you don’t. Alternating Current (AC) is only required when TIG welding aluminium. Almost all MIG welders operate on Direct Current (DC) only, which will work to weld both aluminium and steel.
Setting up your MIG welder
First things first, make sure you have a welder that can be set up for aluminium. It won’t be possible if your machine has a direct connect torch (like the VIPER MULTI 135). You’ll have too many issues trying to feed the filler wire through the torch’s steel liner.
However, if you have a Euro connect torch and can change the MIG liner in it, you’ll be able to set your machine up for aluminium with relative ease.
Choosing an aluminium filler wire
When it comes to choosing a wire for your weld, like all welding, one of the things you need to do is match your metal grades. There are two main filler wire grades you can get: 4043 and 5356. These aren’t the only available fillers, but they’re the most common.
They’ll work with most aluminium grades, so you can use them even if you’re not sure what metal grade you’ve got.
- 4043 is used on 4000 to 6000 series aluminium and contains silicon
- 5356 is used on 3000, 5000 & 6000 series aluminium, is marine grade and contains magnesium
Both fillers are aluminium alloys, with 4043 containing 5% silicon and 5356 containing 5% magnesium. The different makeups of each wire give them slightly different characteristics.
The most notable difference is that 4043 wire is softer than 5356 wire. Because 5356 wire is harder, it’s generally preferred when MIG welding, as it tends to feed better. However, if you’re welding a 4000 series aluminium, you’ll have to use 4043 wire.
Once you’ve got the right wire type, you’ll need to get the correct diameter size. Aluminium wires, both 4043 and 5356, are softer than mild steel, so the smallest wire size you can feed through a MIG torch is 1.0mm thick. The other common aluminium wire size is 1.2mm.
0.8mm-0.9mm wires are too thin to be fed through a MIG torch regardless of the prep. The softness of the wire makes it very prone to birdnesting, and running the smaller sizes only makes this worse. However, you can use 0.8mm-0.9mm wires in a spool gun.
Needing 1.0mm wire for your MIG torch does mean that your minimum base metal thickness is 2mm. Anything thinner, and you’ll want to TIG weld it or look at getting a pulse MIG.
MIG torch setup to weld aluminium
If you’re regularly swapping between steel and aluminium, you might want to consider getting a second torch. That way, you won’t have to continually swap out the internal parts and only need to swap between the torches.
Having a second torch just for your aluminium could save you a lot of time that would’ve otherwise been spent setting up.
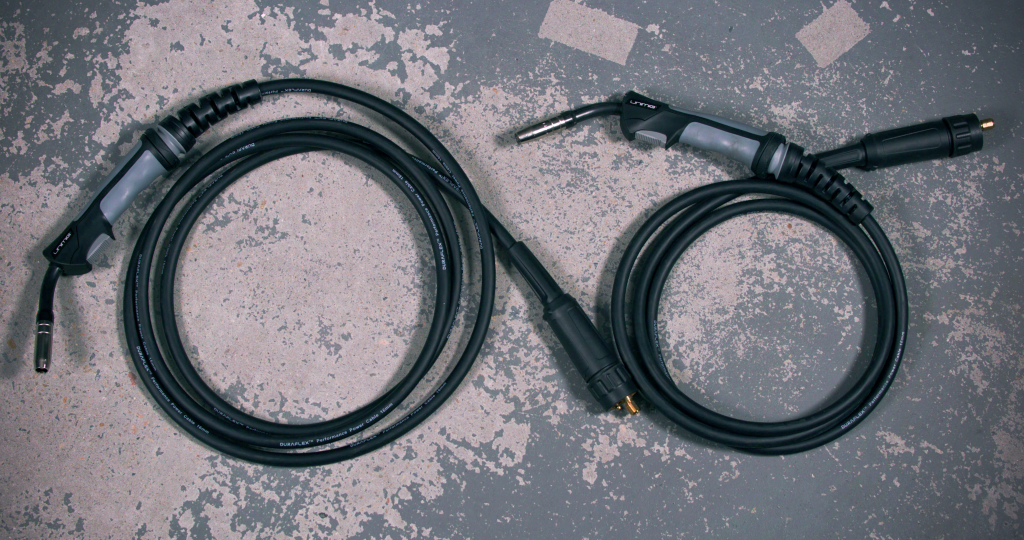
Whether you get a second torch or not, here are the things that need to be changed for the best chance at smooth feeding.
Torch length
First things first, use the shortest MIG torch you have. If the only torch you have is over 4 metres, your best bet will be getting a new one entirely.
The further the aluminium has to travel, the more friction is placed on the wire, increasing your chances of running into feeding issues.
The best torch length for welding aluminium is 3m, although you can also use a 4m torch. The key is to keep the torch lead as straight as possible while the wire is being fed.
If you need a longer reach than 4 metres, you’ll need to look at getting a spool gun or push-pull gun. These guns come with 6m or 8m leads, and they’re both designed to weld aluminium.
Torch liner
When working with aluminium, you’ll need to change your torch liner. Over time, your regular steel liner becomes filled with steel shavings from the filler metal, which can cause problems. Using your steel liner usually results in wire feeding issues, or it could contaminate the weld.
That’s why you’ll need to change out your liner for a Teflon one. These are basically the same as your standard liners, but they’re made with a different material. The Teflon material offers less resistance, so your aluminium feeds smoothly.
Like with all liners, it will need to match the size of your filler. In the case of aluminium, you’ll probably always want a red one for 0.9mm-1.2mm wire sizes.
On top of the different liner, you’ll also need to attach a neck spring to the front end of it when you change it out. The neck spring keeps the liner rigid, which makes it easier to feed into the torch.
Not sure how to change your liner? Check out our step-by-step guide on changing a MIG liner.
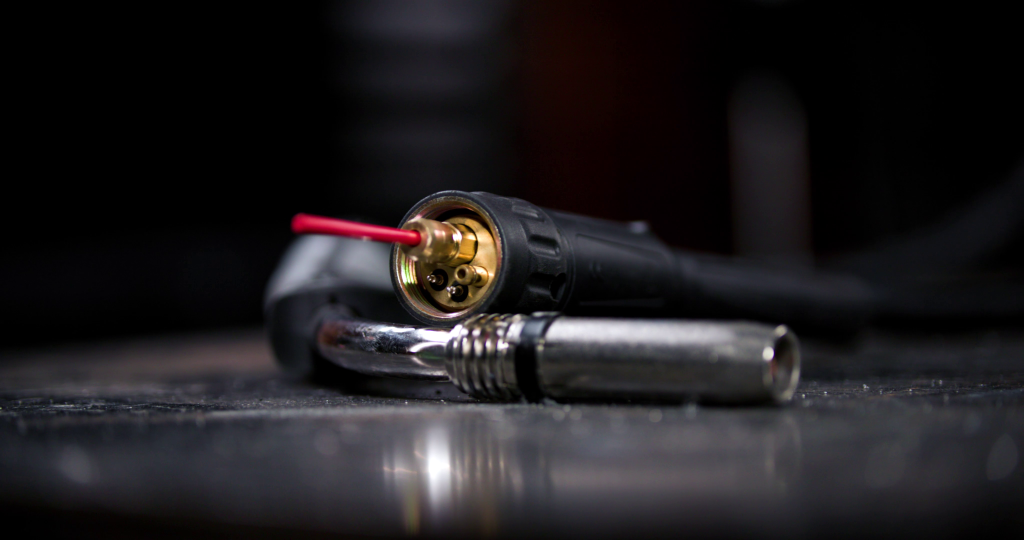
Contact tip
The last thing that should be changed on the torch is the contact tip. Standard steel contact tips are too small for aluminium wire. As the aluminium heats up, it expands more than steel, so the borehole in a standard steel tip is too small, and the wire can’t feed.
There are two ways you can work around this. The first (and better way) is to get yourself some aluminium-specific contact tips. A 1.0mm aluminium tip has a bigger opening hole than a 1.0mm steel tip, removing the issue of the wire not fitting.
The other option is to use a steel contact tip that’s one size up from the size of your wire. However, this isn’t as reliable, and you might run into some problems with the wire not becoming conductive.
Guide tube
Depending on the machine, you may also need to change out your guide tube. The guide tube is the round, hollow tube between the front panel where the torch connects and the drive rollers.
On some machines, this can’t be removed or changed, but if it can, then you should replace it with an aluminium one. The guide tube can generally be removed with a pair of long-nose pliers, and then a new one can be slipped in.
Aluminium-specific guide tubes give the filler wire extra support between the rollers and the start of the torch, eliminating one of the most common spots that causes birdnesting. Like aluminium contact tips, the opening in the tube is wider, allowing the wire to expand as it heats.
Drive rollers
Next up are your drive rollers. You’ll need U groove rollers for your aluminium wire. Unlike the V groove steel rollers, the smooth, curved bottom of the U groove gives more grip on the wire without any distortion.
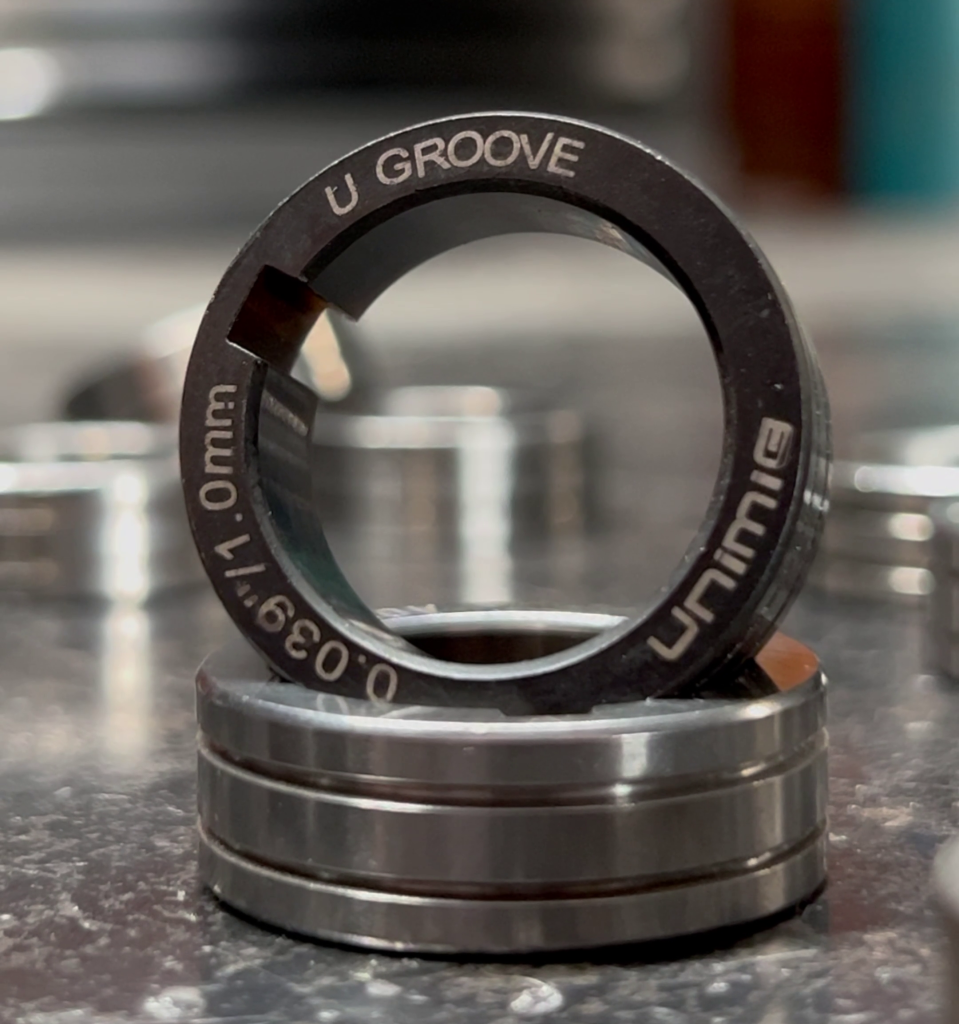
Because U groove rollers provide a more conformed grip to the profile of the wire, you don’t need as much tension on the wire.
Roller tension
Make sure your tension on the wire drive rollers is correct. As with any wire, having too much tension on them will distort your wire out of shape, which will cause issues as it drags inside the liner. On the other hand, not enough tension will leave your wire slipping.
You can check the tension on your rollers by feeding the filler wire through your fingers (with gloves on). Start with the tension so loose that the wire is slipping, and then work your way down the adjustment knob (gaining more and more tension). Your tension is correct when the wire feeds smoothly through your fingers while gripping it lightly.
That’s all of the internals sorted. Now you can feed the wire into the inlet guide, over the rollers and into the beginning of the guide tube. If you run into any issues, give our troubleshooting wire feeding guide a run-through.
Using a spool gun to weld aluminium
A spool gun isn’t essential, but it is designed specifically to weld aluminium.
Rather than feeding your wire through a long torch lead, the spool holder is attached to the gun. It reduces the wire’s travel distance from 3 or 4 metres down to approximately 30cm (from spool to weld pool). It also comes with its own mini geared drive roller system in the torch, which helps to feed the wire smoothly.
Spool guns completely eliminate birdnests and wire kinking, the two biggest issues you’ll face when it comes to MIG welding aluminium. They also come with a longer lead, which gives you more flexibility and movement from your machine.
On the other hand, they can only house 100mm wire spools. Housing the spool on the torch can make them heavy, fatiguing your hands faster because of the wire spool you’re holding.
The spool housing also makes the torch bulkier than a standard MIG torch. It can be harder to get into tight spots or corners without being at an awkward angle or losing your gas coverage.
They’re also an extra expense, more so than a new torch liner, contact tips, and drive rollers.
If you do want to run a spool gun on your welder, check that your machine has the necessary connections for it, as not every MIG welder does.
If you need help getting your spool gun up and running, we have a step-by-step setup guide here.
Gas
Whether you use the standard torch or a spool gun, MIG welding aluminium requires pure argon gas. Using a standard argon/CO2 gas mix on aluminium will leave you with a contaminated weld full of oxides and porosity.
Polarity
Aluminium MIG welding is done in positive polarity, or DCEP (Direct Current Electrode Positive). To set up a UNIMIG welder for DCEP, plug the polarity cable into the positive (+) panel mount and the earth clamp into the negative (-) panel mount.

Additional features for better aluminium welds
For the best possible starts and ends on your aluminium MIG welds, having a machine that comes with a few extra controls can help.
Inductance
The inductance setting on a MIG welder gives you more control over your arc. It controls how fast the current rises to reach the amps that you’ve selected. Instead of instantly reaching the maximum amperage (which would be quite violent), there’s a (very short) time delay between the starting point and reaching your max amperage.
A high inductance will give you a soft, fluid weld pool that wets into the toes well. It also reduces the amount of spatter produced and improves the appearance of your weld.
A low inductance will give you a narrower weld pool that freezes faster. It’s good for pin-pointing a weld, especially on thinner metal, but it can produce more spatter.
Hot Start
The hot start feature on a MIG welder will allow you to add a boost to the welding current at the start of your weld. It works to eliminate issues with starting on cold metal, which is very useful when you’re trying to start a weld on cold aluminium.
Crater Fill
The crater fill (or stop current) feature on a MIG welder lets you choose how hot or cold the weld will end, similar to the end amp setting on a TIG welder. By allowing the weld ramp down to a lower amperage and filling in the end of the weld, you reduce the chances of shocking the metal and being left with a crater or crack.
Post-Gas
The post-gas or post-flow setting lets you run gas over the end of your weld and keep it shielded from atmospheric contamination while it cools. Like with the stop current, this helps reduce your risk of shocking the metal and having a crater or crack form in the weld.
Not every MIG welder will have any or all these settings available, and you’ll likely need a pulse MIG machine to get all of them on a single machine.
Choosing a suitable machine to MIG weld aluminium
Every UNIMIG MIG welder can weld aluminium, but some are better than others. The only exception is the VIPER MULTI 135, which has a direct connect torch.
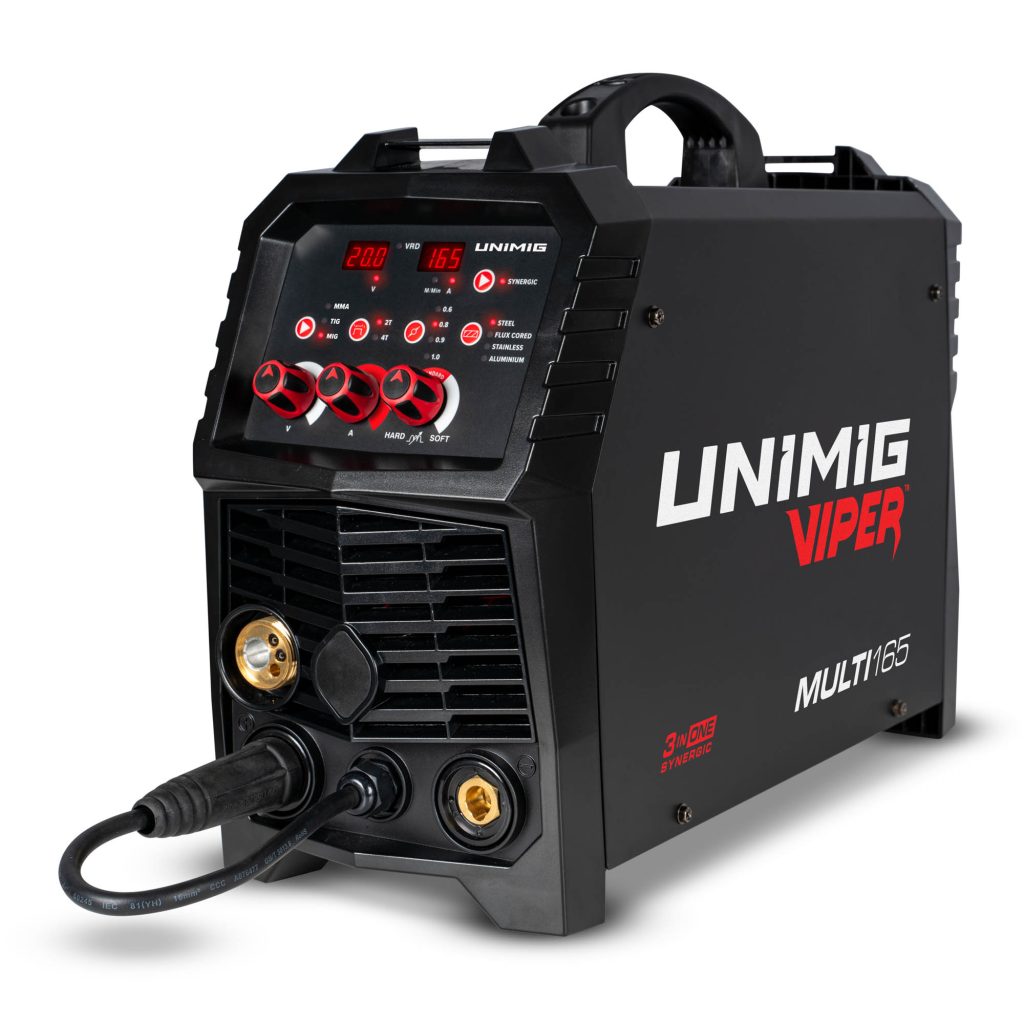
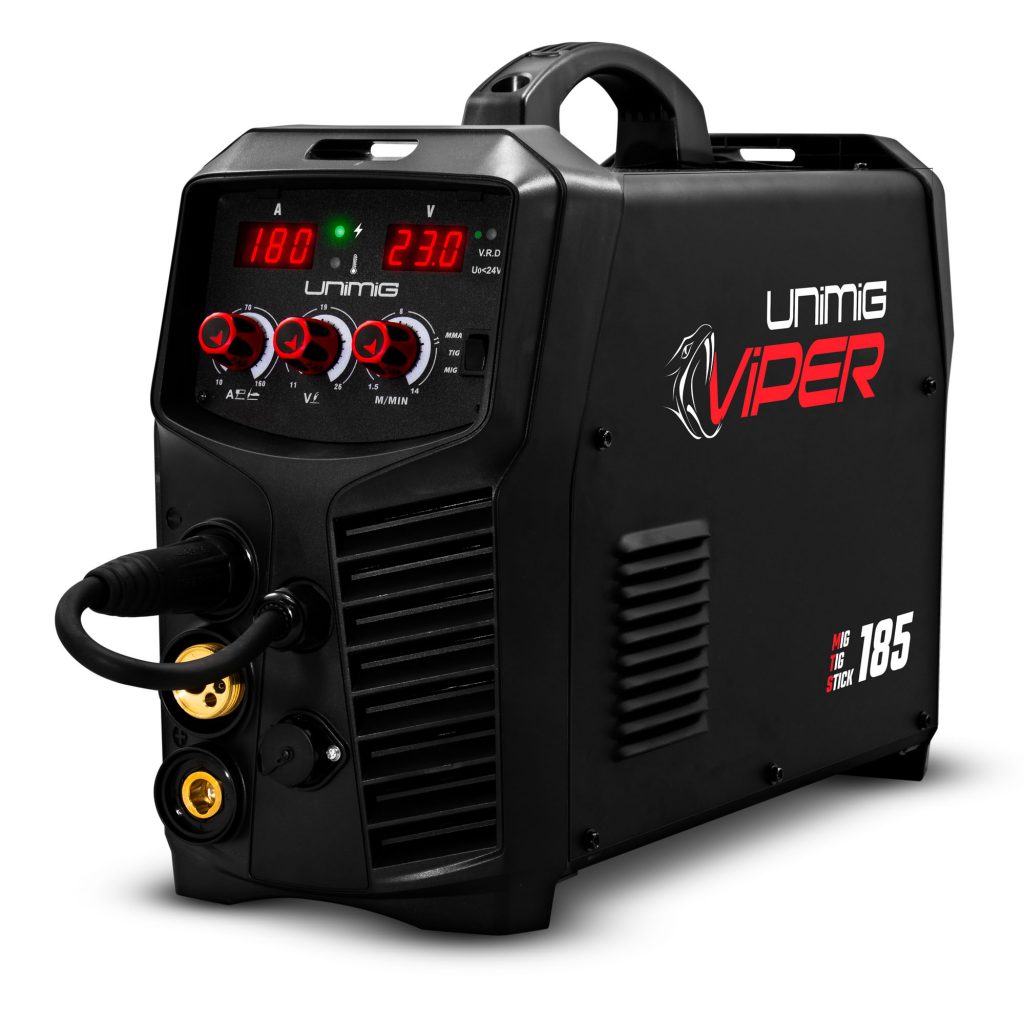
For a good, entry-level MIG welder that can also weld aluminium, check out the VIPER MULTI 165 and VIPER MULTI 185. These are small, portable, DIY machines that are easy to set up and use.
The VIPER MULTI 165 has built-in synergic programs and an inductance control, but it isn’t spool gun compatible. The VIPER MULTI 185, on the other hand, while it doesn’t have the additional settings, is capable of connecting a spool gun.
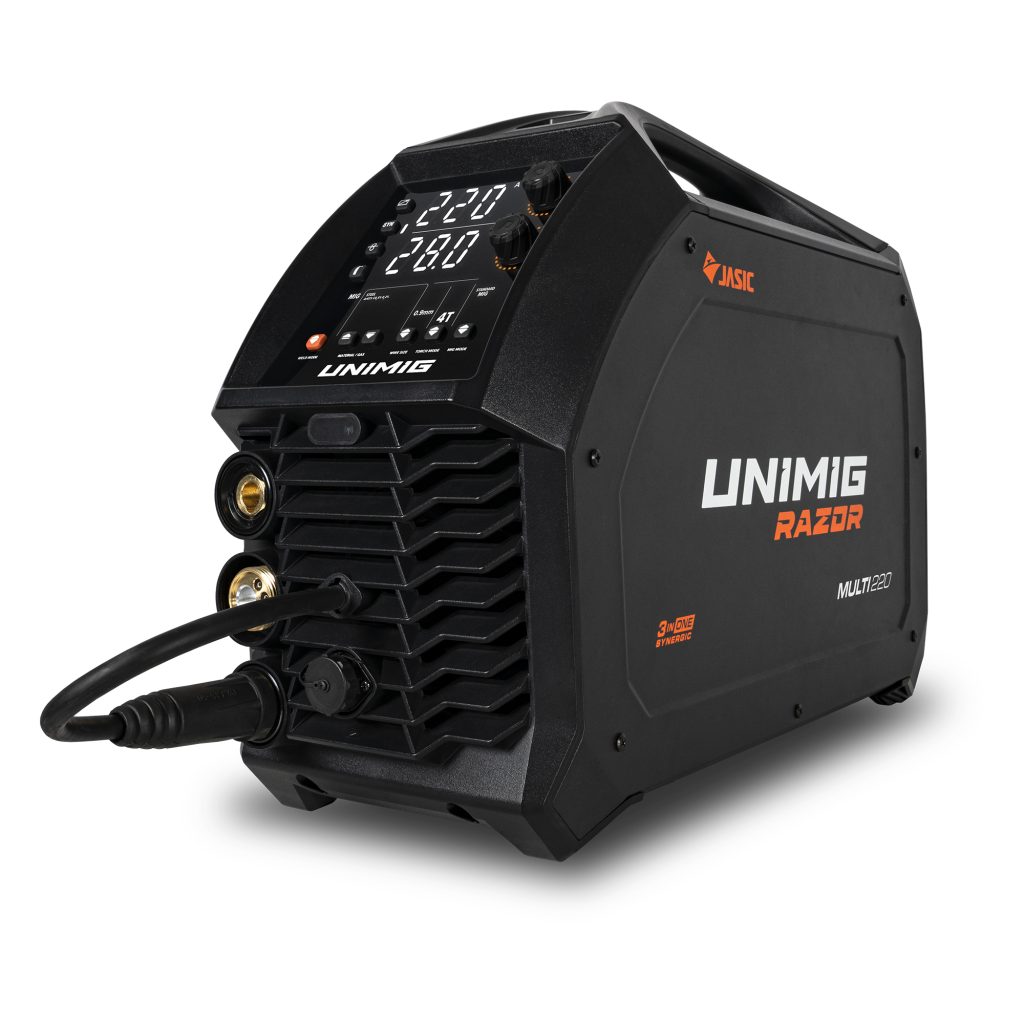
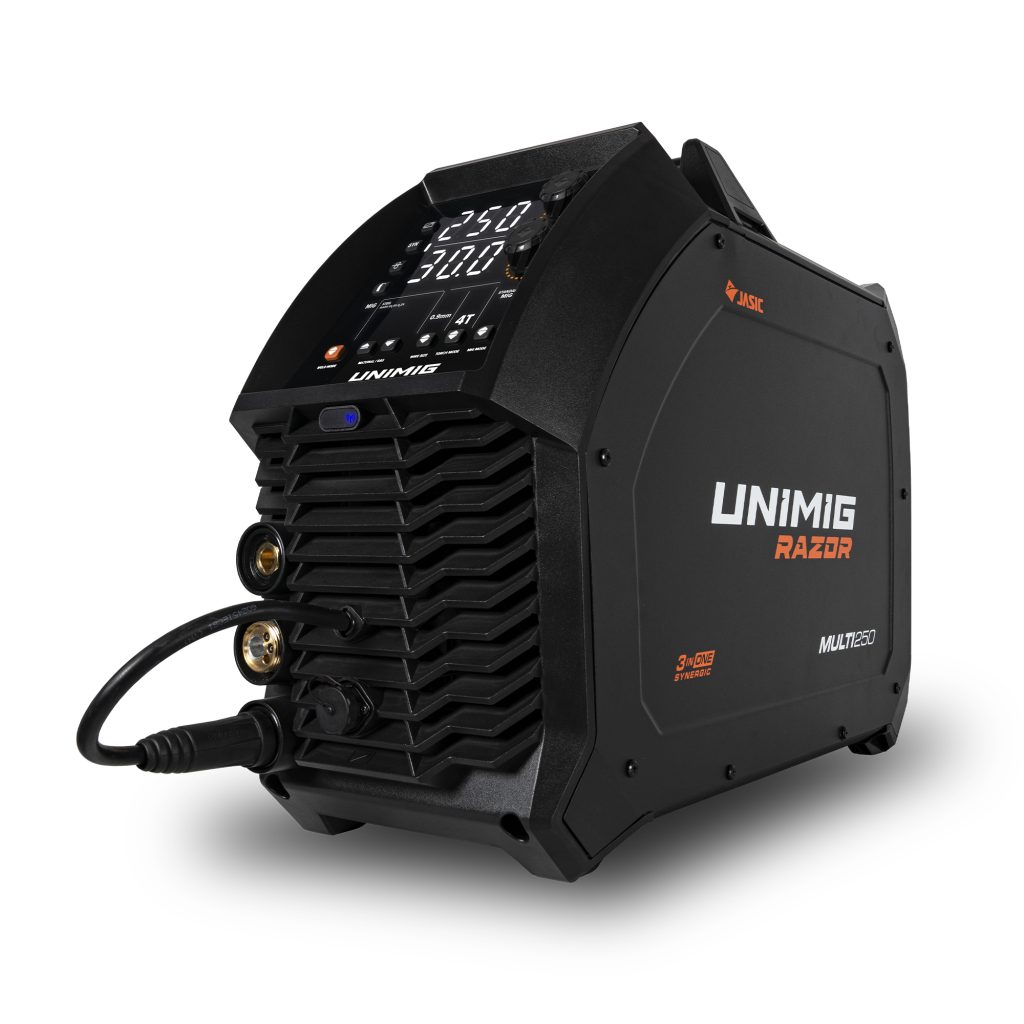
For a better, professional-grade MIG welder that can weld aluminium, check out the RAZOR MULTI 220 & 250. These machines are more powerful, so they can weld thicker material, and they both have inductance and post-gas settings available. They are both able to run a spool gun. Short of getting a pulse MIG, these machines are your best option for getting a standout weld on aluminium.
For the best aluminium MIG weld possible, check out the RAZOR 200 PULSE. With its single and double-pulse programs, you get fast, high-quality, aesthetic, spatter-free welds, and all on a single-phase 15amp plug.
It may take some time to get all the necessary bits and pieces to swap over to aluminium, but once your machine is set up, you’re ready to go. The next step is making the weld.
Need some help with the actual weld? Check out our blog on how to weld aluminium.