Welding Burnback: What Is It and How to Adjust the Controls
December 10, 2021
When it comes to welding burnback, there are two things someone could be talking about.
One: the welding problem of burnback on a contact tip. Or, two: the adjustable burnback control available on some MIG machines.
Despite being two different things, burnback controls most likely got their name because they’re used to eliminate the welding issue. So, what are they both, and what do they do?
What is Burnback?
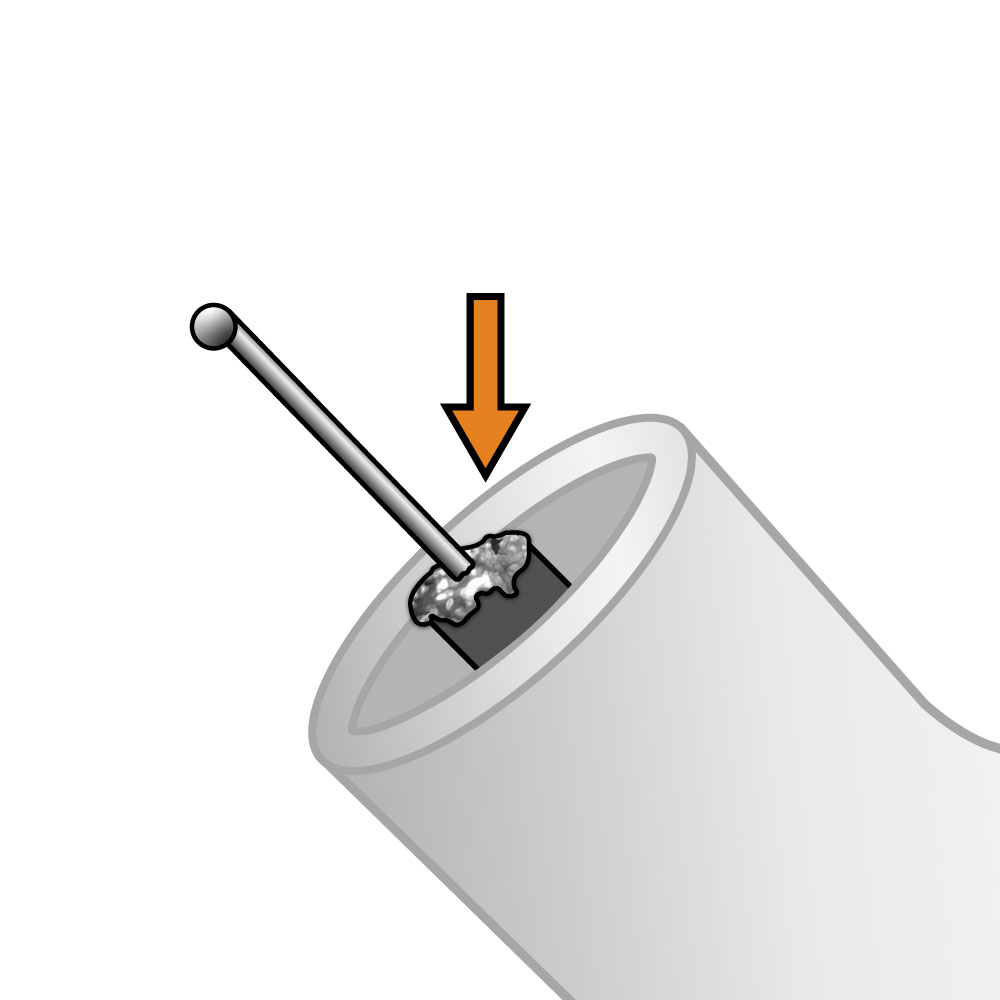
Burnback happens when your wire arcs at the opening of the contact tip and burns back into it, welding itself to or inside the tip. Burnback is specifically a MIG problem, as it only occurs with a continuously fed wire through a small contact tip opening.

Once your wire has burnt back, it’s game over. You’ll have to remove the contact tip and start again. Even if it only welded to the contact tip a little bit and you could file it off, just get rid of it. The leftover residue will make it more likely that the wire burns back again, not to mention the potential weld contamination it could cause.
What Causes Burnback?
Wire feed speed is too slow
A slow wire feed speed means that the arc is melting the wire faster than it’s coming out of the machine. If it’s burning faster, it’s only got one place to go, and that’s back up the wire and into the contact tip. Holding the torch too close to the workpiece
The closer your torch is to the workpiece, the easier it is for your arc to jump up into your nozzle and contact tip.
Erratic wire feeding
Erratic wire feeding usually happens because the filler wire hasn’t been tensioned correctly. If you’ve added too much tension, the wire will struggle to feed, and it’ll jump or bounce between feeding and becoming stuck. Those periods where the wire is stuck create the perfect opportunity for the arc to burnback.
A bad grounding
If your earth clamp loses contact, the voltage will drop, but the wire will keep feeding, which causes burnback.
Wrong contact tip size
If you’re using a contact tip that’s too small, your wire is going to stick and drag through the opening. If the tip is too big, the wire has space to rattle around in it. Either way, you end up with poor conductivity and a recipe for burnback.
Damaged or wrong liner
In the same vein as the contact tip, if your liner isn’t the same size as your filler wire, it’s going to drag or be loose. The other issue with liners is that they can become damaged, kinked, or be cut too short. All these things cause wire feeding issues, which can lead to burnback.
Having the burnback control turned up too high
If you have an adjustable burnback setting on your welder and you left it set to the max, you’ll likely be flying through contact tips.
How to Prevent Burnback
The good news is that there are some easy changes you can make to prevent burnback.
First, check your settings
Your voltage and wire speed work hand in hand, so your wire feed speed should be fast enough to keep up with your heat. If you’re not sure where to start, every UNIMIG MIG welder (except the VIPER 120) comes with a settings chart in the door of the machine. The recommended settings are a great starting point for a wire feed speed that’ll match the voltage.
Second, use the correct consumables
The state of your consumables will dictate the state of your weld, so get the right ones. Your contact tip and liner should match your wire size, and all of it should be clean. Anything less, and you’re going to have problems.
Third, watch your wire tension
It seems like such a small issue, but wire that isn’t tensioned correctly can cause a lot of problems. The wire should feed smoothly, but it shouldn’t be so loose that it slips. For more on loading a wire spool, check out our Ultimate Guide to MIG Welding, or watch our video on how to tension your wire.
Fourth, get a good earth
Having a good ground is essential for any weld. The earth clamp completes your electrical circuit; without it, the machine won’t arc. That’s why you need to make sure your clamp has been attached to clean, bare metal, and it isn’t going to be bumped or moved.
Fifth, maintain your torch distance
For most MIG welding, your wire should stick out of your torch nozzle by roughly 1cm. That means your torch should be at least 1cm away from the joint. Too far away and you’ll get excessive spatter, too close and you’ll weld your contact tip.
Sixth, if you have an adjustable burnback control, adjust it.
Don’t leave your burnback set all the way on or all the way off. Neither of those is going to be ideal for most welds. Somewhere in the middle will work well and leave the right amount of wire on most metals and applications.
Burnback Controls
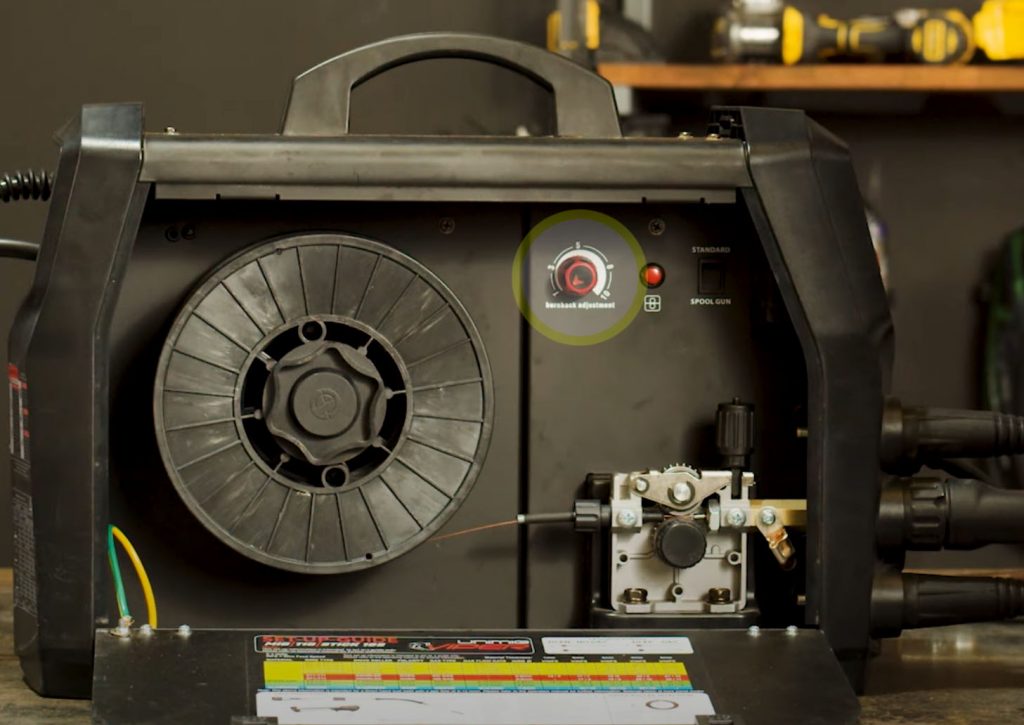
The burnback control on a MIG welder is used to set how far the wire will burn back once the torch trigger has been released.

If a machine didn’t have any burnback, the filler wire would stick to the weld when you released the torch trigger. The arc would stop at the same time as everything else, leaving your wire where it was – in the weld joint.
That’s where the burnback comes in. It allows the wire to remain electrically charged for a brief moment, meaning you don’t have to cut it free after every weld.
Even if you don’t have an adjustable setting, that doesn’t mean the machine doesn’t have any burnback. It just means that it has a built-in burnback amount.
The burnback controls on a UNIMIG welder can be adjusted from 1-10. 1 would be almost none, and 10 would be the max amount.
Setting your machine to 1 and having no burnback means you run the risk of the wire sticking out too far and becoming stuck in the weld.
Setting your machine to 10 and having the max burnback means you’re probably going to end up self-inflicting the actual welding problem of burnback.
We recommend setting your burnback to 5, or in the middle range, for the best results.
What you set your burnback controls to comes down mostly to personal preference. How far do you want your wire to stick out of the torch when you stop welding? If the answer is a lot, turn your burnback down. If the answer is not a lot, turn the burnback up.