The Top 9 Tips and Tricks for the Best Aluminium MIG Welds
July 4, 2023
MIG welding aluminium can be much more finicky than mild and stainless steel, especially when using the torch the welder came with. As a softer wire, it’s much more prone to feeding issues. We’ve put together a list of tips to make your MIG aluminium welds problem free.
1. Prep your metal properly
One of the most important things to do when working with aluminium is to clean it thoroughly. It’s not a forgiving metal, so any dirt, oil, paint, etc., is going to give you problems.
First things first, get yourself a dedicated stainless steel wire brush for your aluminium and brush your joint clean. You’ll want a separate brush for your aluminium as you don’t want to grind contaminates from other metals into the plate you’re trying to clean.
The cleaner your metal is, the better. Once you’ve wire brushed the metal, wipe it down with acetone or isopropyl alcohol to remove as much of the oxide layer as possible.
Once your metal is clean, the next step is fitting up the joint. You want your two pieces to be completely flush. You shouldn’t have any overlapping corners or gaps, as these will make getting a weld more difficult.

2. Preheat your metal
When working with thicker sections of aluminium or in a cold climate, preheat your metal. Starting off cold can make it much harder to get a good weld on aluminium, so heating it with an oxy torch makes it much easier to get full penetration through the joint.
3. Use aluminium-specific parts
When welding aluminium with a standard MIG torch, you’ll want to swap all your parts out to aluminium-specific ones. That way, you have the best chance of getting the wire to feed well.
To start with, if you can, get yourself a 3m torch. The shorter the distance the wire needs to travel, the better it’s going to go because there’s less space to run into issues.
Next, swap your steel liner out for a Teflon liner. Teflon liners are designed to feed aluminium, and they’re made of smoother material to minimise friction and resistance and keep the wire from catching on the inside.
While installing the Teflon liner, you’ll also need a neck spring. The neck spring attaches to the torch end of the liner to help with heat control as the wire exits the torch.
You’ll also need to swap your drive rollers out to U groove rollers, as they have a smoother curve in the bottom than V groove rollers. The U-shaped groove minimises the risk of the wire deforming that you could face when running aluminium through the sharper V groove roller.
Lastly, swap your torch’s standard contact tip for an aluminium contact tip. The borehole at the end is slightly wider in comparison to the same size steel tip. Aluminium expands when heated, so the bigger hole helps keep it from getting stuck or catching as it exits the torch.
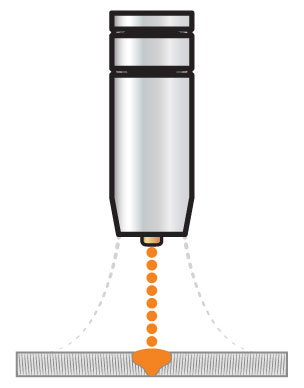
4. Adjust into spray transfer
When welding aluminium, you want to crank your voltage and move into the spray transfer mode, which provides a hotter, smoother weld with less spatter. The thicker the metal you’re welding, the heavier the spray should be.
Aluminium is a good heat conductor, so it sucks the heat out of a weld faster than mild steel does, especially on thicker sections. Using a hotter transfer method means it’s easier to get a good weld.
5. Always push the weld
Aluminium has to be pushed. Generally speaking, all of your MIG welds should be pushed (unless you’re using flux-cored wire), as pulling provides no penetration and less gas coverage. But it is especially critical when MIG welding aluminium.
Because you’re MIG welding, you miss out on the full cleaning action that’s available with an AC TIG weld. That makes the argon that shields your weld extra critical, so it needs to be out in front of the leading edge of the weld puddle.

Dragging your torch while welding aluminium can leave you with a lot of tiny porosity holes. When you’re dragging your torch, the gas lags behind, so all those contaminants that should’ve been removed before you got there are sucked into the puddle.
6. Fill in your craters
It’s super important to fill the end of any weld, but especially aluminium, as it’s extra susceptible to thermal shock and cold cracks.
If your machine has a crater fill option, like the RAZOR 200 PULSE, set it so that the end of your weld is properly built up and there are no craters or holes that can cause cracking later on.
If your machine doesn’t have a crater fill setting, you’ll need to do it manually.
To do this, one option you can use is the back-step method. When you reach the end of your weld joint, move back by a few millimetres; that way, the weld isn’t terminated right on the edge, and there’s a proper build-up of metal.
Another option, though it might not always be possible, is to use run-on and run-off plates. The plates are attached to either side of the weld joint and used to start a weld, eliminating any cold start issues, and to end a weld, removing any chance of having a crater.
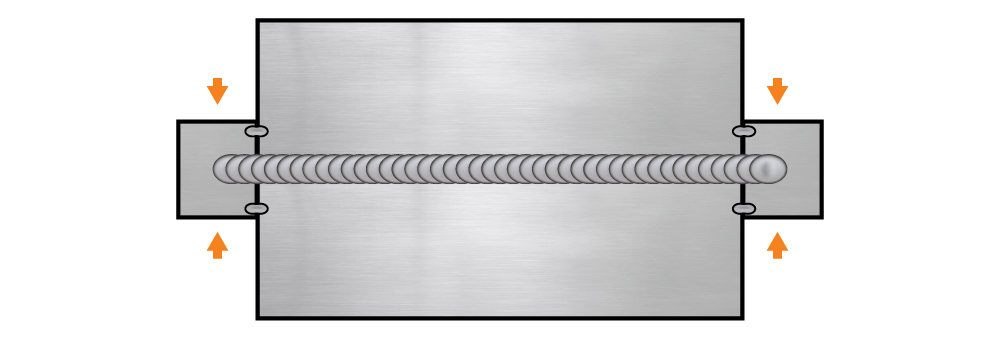
Once the weld is done, you can snap or grind the run-off plates off, and you’re left with the best part of your weld and no craters.
The last option is to pause at the end of the weld, adding extra metal before releasing the trigger, filling the end of the weld to stop a crater from forming.
7. Use the stiffer wire
When welding aluminium, you’ll need to use filler wire that’s compatible with your parent metal. Where possible, though, try and use 5356 filler wire rather than 4043.
5356 isn’t quite as soft as 4043; it bends less, so it’s easier to feed, especially when it needs to travel the length of a MIG torch.
However, if you’re welding on 4000-grade aluminium, you won’t be able to use 5356.
8. Straighten your torch lead
It sounds super simple, but it makes a massive difference to how well the wire will feed if the torch lead is curled, looped or kinked compared to when it’s straight.
9. Get a Spool gun or Push-Pull gun
If all else fails when trying to weld aluminium with your MIG machine, you can look to get a spool gun or a push-pull gun, both of which are specifically designed for this application.
A spool gun cuts the feeding distance from several metres (3m-5m depending on your torch) down to roughly 50mm. By moving the spool roll from inside the machine to directly on the torch itself, there’s less chance of feeding issues because of the short distance it needs to travel.
If you’re looking at doing production work where you’ll need to do a lot of aluminium welding, you can also look at getting a push-pull gun. The wire spool is still loaded in the machine, but there is a second small motor in the torch itself, which helps to pull the wire from the machine, making feeding more consistent.