How to Weld Vertical Up
February 21, 2022
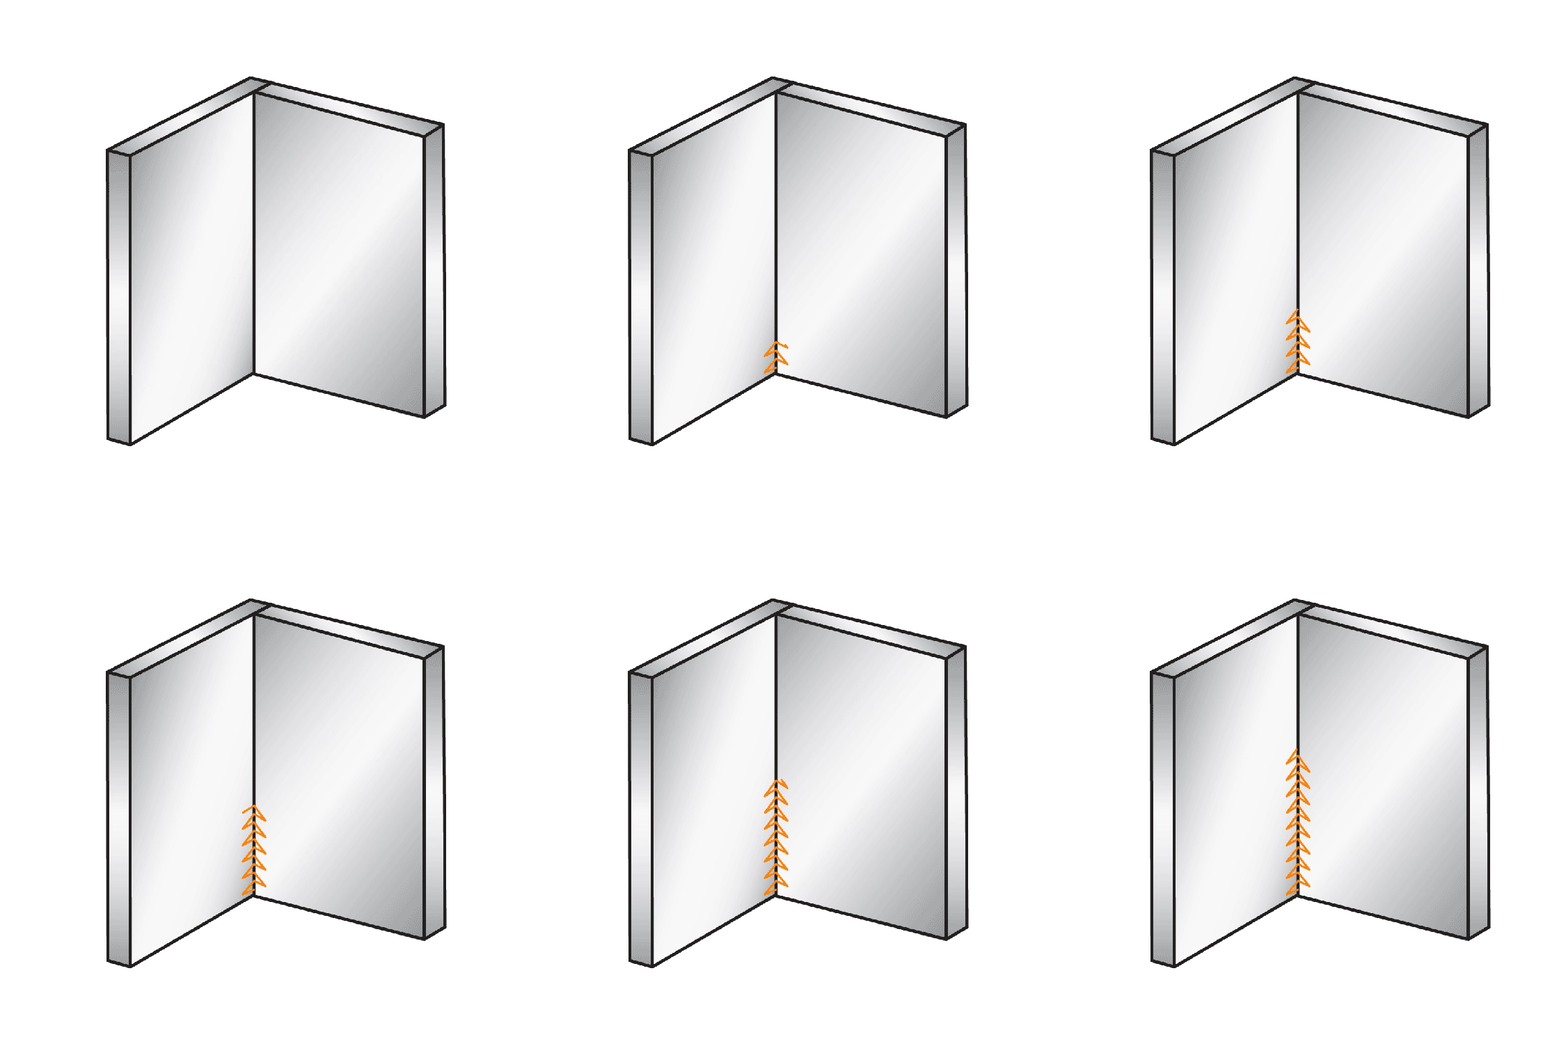
There are a number of different positions that you can weld in: flat, horizontal, overhead, and vertical. Most welding is done in the flat position because it’s the easiest, but sometimes you won’t have a choice. If the metal you’re welding has already been stuck up in the air vertically, that’s the way you’ll have to weld it.
A few applications that’ll require a vertical up weld include structural welds on buildings and pipe welding. A lot of those welds will be done on thick, heavy metal, which you can’t just lay down and move later.
Thanks to gravity, it’s one of the harder positions you can weld in, but it’s a great skill to have. Though it can be challenging to learn, there’s a trick to perfecting your vertical up weld every time, whether it’s MIG, TIG or stick.
Welding Up With MIG
In general, vertical up MIG welding is done much the same way as standard MIG welding, with just some minor changes. To get a good, penetrative vertical up weld, all you need to do is turn your settings down and make triangles. Not sure what that means? Let’s explain.
Get the Settings Right
When you’re welding upwards, you’re fighting against gravity. That means if your weld pool is too fluid, you’re not going to be able to control it properly. You’ll find most of it ends up dripping down or falling out of the joint.
That’s why turning your settings down is the first step to getting a good vertical weld. They don’t have to be super low; you still want to get enough heat in the metal to penetrate it. Whatever settings you would typically use for a down hand weld, we recommend decreasing your volts by about 3 or 4 and your wire speed by about 5 or 6.
Here’s an example: say you’re welding 6mm steel with 0.8mm wire. For a standard weld sitting flat on the bench, your settings should be around 23V (volts) and 12m/min (wire speed). If you wanted to weld vertical up on that same metal, you’d drop your settings to look more like 19-20V and 6-7m/min.
Once you’ve adjusted your settings so that your weld isn’t falling out, the second step is your technique. That’s where the triangles come in.
Making Triangles

The triangle technique is exactly what it sounds like. You want to move your torch in such a way that it looks like you’re drawing triangles. Using the triangle technique, you can maintain control over your weld pool and get proper penetration into the joint.
Moving your torch around in a triangle shape will also help spread the heat out. Rather than being focused in one spot, the heat is constantly moved around the joint, keeping the overall temperature down.
So, how exactly do you do that? When it comes to vertical up, you don’t want to start in the middle of the joint. You want to start your arc angled to one side. Whether you’re doing a butt weld or a fillet weld, you’re going to have a left side piece and a right side piece of metal.
It doesn’t matter which one you start on. Let’s say you start your weld on the left. The first step is to move your torch from left to right, going straight over the joint. You want to build a base to start with before moving into the rest of the triangle motion.
Once you have a base, the next step is to weld diagonally up into the joint. Your torch should move from the right-hand side up into the centre of the joint. Next, weld diagonally down to just above where the weld started. The entire motion looks like a triangle. That’s the first triangle done. Now you can just repeat the steps: straight, diagonal up, diagonal down.
Keep the torch as tight in the joint as you can, and you’ll be able to maintain control over the weld pool, leading it where it needs to be.
To get the best result, pausing momentarily on the sides and punching into the middle will help with penetration and get the weld to sit in the joint flatter.
Upside Down V Technique
The triangle technique is not the only one that can be used to weld vertical up. There’s also the upside-down V. It looks and works exactly the way the name suggests, and the principle is the same as the triangles.
The three points of the V will have you wetting into both sides and punching into the middle.

For the most part, vertical techniques all aim to do the same thing: keep the weld pool in the joint and punch into the corners and the root.
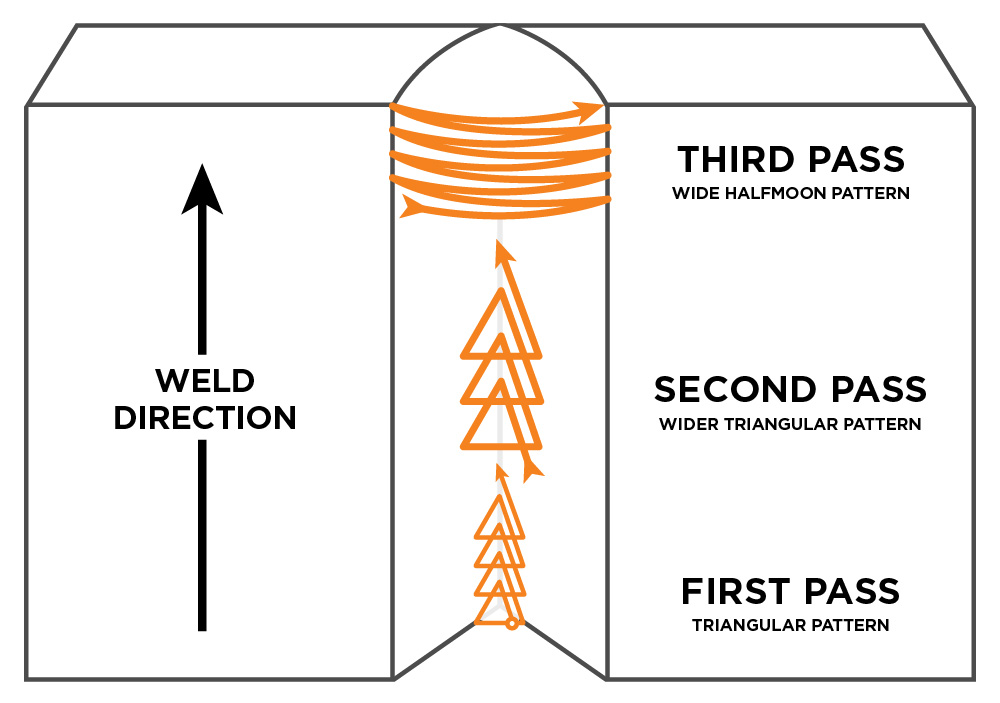
Once your root run is done, you won’t need to use the triangle (or any other) technique on second or third (or more) runs. Your second and third runs should be made to strengthen or cap your weld, so all that torch manipulation isn’t necessary.
A small weave will suffice, pausing on the edges to ensure everything is blending in together. If you’re not pausing on the edges, you risk getting undercut in the weld. Undercut is a weld defect that will need to be fixed. Keep your edges tied in, and you’ll finish with a professional-looking vertical weld.
Welding Up With STICK
Just like with MIG, when it comes to vertical stick welding, gravity is the biggest challenge. Besides adjusting your settings, however, it’s also about picking the right electrode for the job. There are a range of electrode types, each with its own properties, that can impact how well it will work in the vertical position.
Picking a Stick Electrode
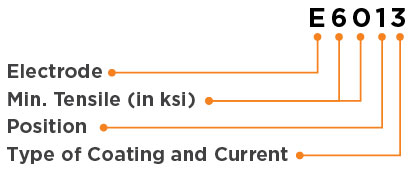
Every electrode has a classification stamp on its end. Steel electrodes come with an ‘E’ followed by a 4-digit code (e.g. E6013) stamped on their end. The E simply stands for electrode. The first two numbers (60) represent the tensile strength, the third (1) indicates the positions it can be used in, and the fourth (3) refers to the type of coating on it.

When you pick your electrode, you’ll want one with a tensile strength the same or more than your base metal. Its third digit should read 1, which indicates that it can be used in all positions, including vertical up. You’ll also want a coating that isn’t too aggressive or digging, as it’ll be much harder to control while going uphill.
For more on electrodes and which one you should use, check out our Ultimate Stick Welding Guide.
Push or Pull?
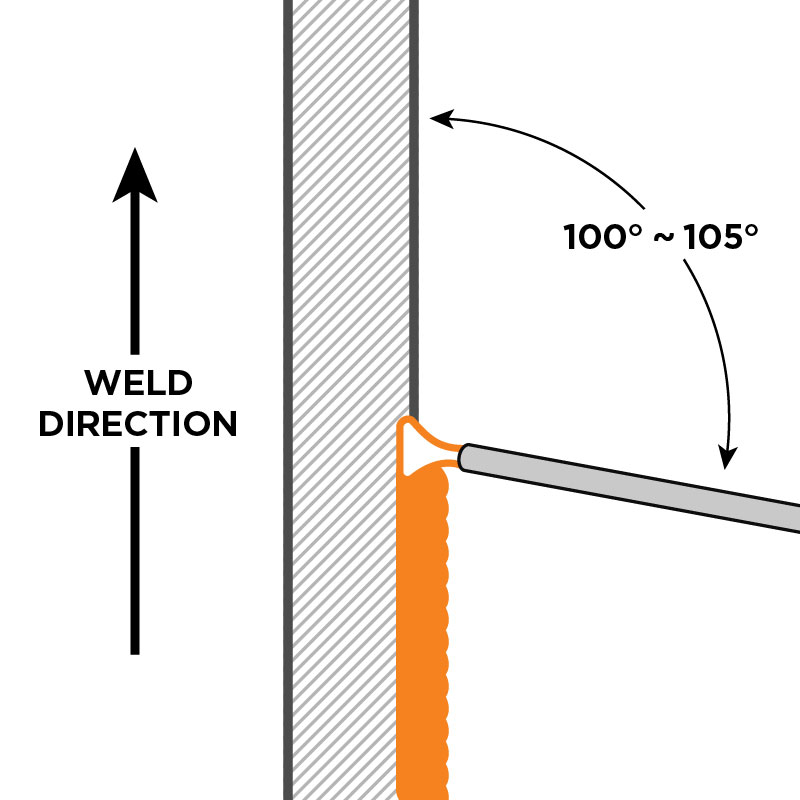
Once you’ve got the right electrode, the next thing to consider is the technique. Unlike any other kind of stick welding, vertical up is the only time you’ll want to push the weld. It shouldn’t be a steep pushing angle, but if you tried to pull the weld up, it would just fall out.
The reason you want to push rather than pull is because it provides the penetration. Pulling molten metal uphill isn’t going to sit in the joint, let alone penetrate. By pushing, you can be sure that you’re getting adequate penetration on the weld.
When pushing a weld, you’ll want to have a travel angle of 10°-15°. That’s also true of vertical up stick welding. Your electrode should be pointed at the centre of the joint (e.g., perpendicular/90° on a butt weld) and then lowered slightly.

Lastly, make sure to keep your arc as tight as you can without sticking the electrode. Keeping a tight arc will help you control the puddle, and it’ll keep the voltage lower. The longer the arc, the higher the volts and the hotter the weld.
Vertical Up Stick Welding Technique
As well as being the only time a stick weld is pushed, you’ll also need to manipulate the weld as you go vertical up a joint. Generally speaking, stick welding is used on thicker materials. You’re not going to be welding car panels with it. With that in mind, most welds that have to be done vertical up will be relatively thick (around 6mm+).
When welding thicker metal, you’ll almost always be welding into a corner of some sort. Even if you’re doing a butt weld, if you’re working with metal that thick, it’ll be bevelled. If it wasn’t, you’d never penetrate all the way through. So, you’ll probably need several passes on 6mm or thicker plates. That’s where vertical up stick differs from standard stick welding.
Like with MIG, your first run should be done with the triangle technique. Pausing on both sides of the weld and punching into the centre will help bridge the gap and provide penetration.
Once your root run is done, if you need a second run, you can just weave. When it comes to the weaving, you want to make sure that you’re zigzagging from side to side, spending more time on the sides than the middle; the middle will take care of itself.
There’s no need for as much manipulation, but you do want the weld to fill the gap and wet into the sides. When done well, the ripples in your weld should be close together, which is sometimes referred to as the rope effect.

Take Your Time
Stick welding vertical up is a slower process than usual. If you try and rush through it, you’re more likely to lose the entire weld. It’ll fall out and drip down, and you’ll need to start again.
Then there’s the fact that it’s stick welding. You’ll need to chip off the slag after every pass, especially if you need to do several. If you don’t, you’ll get slag inclusions, which are a weld defect.
Make sure you spend some time getting the settings right. If you have a tight arc and are moving slowly, but your puddle is still too fluid, lower your settings. There’s a good chance your amperage is too high, and turning it down will make your weld much easier to control.
In general, stick electrodes come with a recommended amperage range. For the most part, using the lower end of that range will provide enough heat to penetrate without sending your weld pool crazy.
However, it might not always work that way. If you’re welding metal that’s on the thicker side, you might not be able to stay in the lower range. For example, welding 8mm mild steel with a 2.6mm electrode. 8mm is about as thick as that electrode will weld, so turning the amps down might mean it doesn’t even melt.
Note: If you’re welding on anything structural, use the recommended electrode size. In the case of 8mm steel, that would mean using a 3.2mm diameter electrode.
If you’re not sure what the best settings would be, we recommend starting with your amps lowered by about 10. Grab some spare metal that’s the same thickness and practice on that. If you find the weld is too fluid or it’s barely melting, adjust your amps by 5 until you find the sweet spot.
Welding Up With TIG
TIG welding vertical up is actually done the same way that all TIG welding is done. So, there are no extra techniques or anything special that needs to be done.
Most TIG is done on thin metal; it’s designed for lower amperage welding. If the amps are already relatively low on thinner metal, there’s no need for extra manipulation to aid penetration. Instead, you can just dab in your filler metal the way you always do.
There are only two things you need to do. The first thing: make sure you can see your arc. If you can’t see what you’re doing, it’s not going to go well. The second thing: make sure you can feed your filler rod in.
Welding vertical up might not be the most common kind of welding there is, and it’s definitely the hardest, but that doesn’t mean you shouldn’t give it a go. It’s still a valuable skill to possess, it’s perfect if you’re looking to take your welding career to the next level, and just like everything, all it takes is practice.