Pipe Welding 101 – How To Get The Perfect Pipe Weld
December 6, 2021
Pipe welding is one of the most valuable skills you can have under your belt in the welding industry. But pipe welding is hard. Why? Because it’s a curved surface rather than a flat one.
You’ve also got to weld in one of the more difficult positions: vertical up. With a bit of practice and the right settings, though, you can be pipe welding in no time.
Prep
When it comes to how it’s prepped, metal thickness is key. If you have a really thin pipe, it won’t need any prep. If it’s a really thick pipe, then you’re going to need to bevel your edges.
Bevelling the edges helps with penetration because it gives the weld somewhere to go that isn’t over and down the side of your pipe. You’re creating a groove that will give you more penetration and a stronger weld once filled.
On top of bevelling, you also need to leave a gap between the pieces, called a ‘root gap’, which will be filled with the first weld (‘root run’). You don’t want to make the gap so large you can’t fill it without issue, though.
Your root run should be the only pass that fills the gap and penetrates the backside. Every pass after that is simply filling the groove.
If you’re cutting your pipe to size with a grinder, saw, or plasma cutter, you’re probably going to have to clean it up. The inside and outside edges aren’t going to be smooth, so you’ll need to remove any burs or excess metal from it before you can bevel it.
Then there’s your standard metal prep, removing any dirt, rust, mill scale, oil and fluids before you can tack your weld.
Tacks
There are a couple of different ways that you can tack your pipe together.
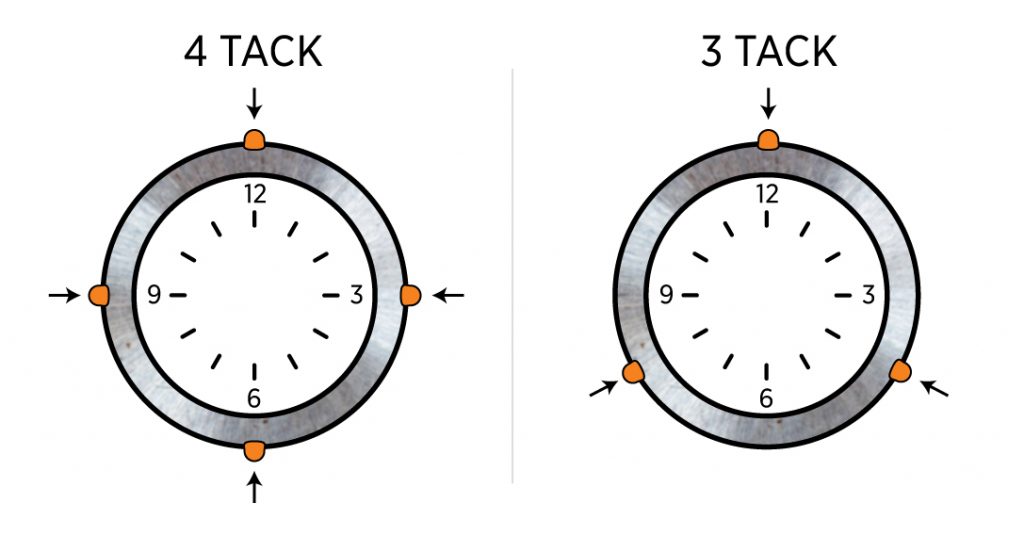
You could put 4 tacks in, thinking of a clock and placing one at 12, 3, 6 and 9.
You could place 3 tacks on your pipe, at 8, 12, and 4 (clock hands) and leave the bottom open.

You can tack your pipe whichever way works best for you, and a bigger pipe will probably need more tacks to hold it than a small one. Just keep in mind that you need to tie your tacks into the final weld, so the more tacks you have, the more grinding or weld manipulation you’re going to have later.
You can’t skip them, though. Tacks aren’t just used to keep the two pieces joined. They’re also used to maintain the gap between the two all the way around.
The more tacks, the better (in most cases), because your root gap will try and close if nothing is holding it open while you weld. If your gap is uneven, there’s a good chance your pipes not going to be straight.
Positions
There are four different positions that are used to classify a type of pipe weld. These positions are mainly used to describe the angle and available movement of the pipe that’s being welded.
1G: The 1G position is where the pipe is laying horizontal and isn’t attached to anything else. You can rotate it and move it however you’d like to make welding it as comfortable as possible. This position is probably the easiest, but definitely the least common in you’re on a worksite.
2G: The 2G position is where the pipe is stood on its base (vertical) and is fixed to its position, so it can’t be moved or rotated.
5G: The 5G position is where the pipe is laying horizontal (like 1G) and is fixed to its position. This is where welding can get tricky, as you might have to work at some weird angles to get all the way around the pipe.
6G: The 6G position is where the pipe is laying at a 45° angle and is fixed to its position. 6G is considered the hardest position to weld because of the pipe’s angle and the inability to rotate it.
If you’re welding at home for fun, using these for distinction probably isn’t going to matter too much, but if you’re looking to make a career out of welding pipes, then you’ll need to know them.
Making The Weld
The goal with pipe welding is to start at the bottom and weld all the way up to the top. So, vertical up. If you can do your root run in two goes (all the up the left and then all the way up the right), that would be ideal.
Obviously, this is more realistic on smaller pipes, and if you’re stick welding a large pipe, you could run out of electrode before you get to the top.
Breaking your pipe into small sections works just as well and lets you reposition easier. Just remember that you’ll need to tie the end of the last weld into the start of the new one every time you stop.
Getting everything tied in is important because the points where you’ve stopped and then restarted are considered weak points. Tying the weld together helps to eliminate that weakness.
When it comes to pipe, you’re going to be putting down a root run. The root run is the first pass, which will penetrate all the way through to the backside. Then you’ll do a hot/fill pass (or several) to fill the joint. Finally, you’ll do a cap pass, which will leave you with a rounded top to your weld to tie it to the edges of the actual pipe metal.
Your settings will generally change between passes. You’ll want to run hotter on your root run than you will on your fill passes because you need to penetrate all the way through. The difference, though, will only be a few amps.
Quick tip: Let your pipe cool down between passes. Preheated metal will react to your settings differently than cool metal does.
If you end up with too much filler in your fill pass, you can grind it down so that your cap will fit.
Having a high cap on your pipe is fine, but it definitely looks better if it’s almost flush. Plus, if you’re planning on cleaning the weld up (grinding it flush), having a high cap means more metal to remove. An almost flush cap is better and means less work later, so try not to overfill in the first place.
Technique
Whether you TIG, MIG or stick weld your pipe, the technique is the same: vertical up. Doesn’t matter if you’re doing your root pass, a fill pass, or you’re putting your cap on. You’ll be going vertical up.
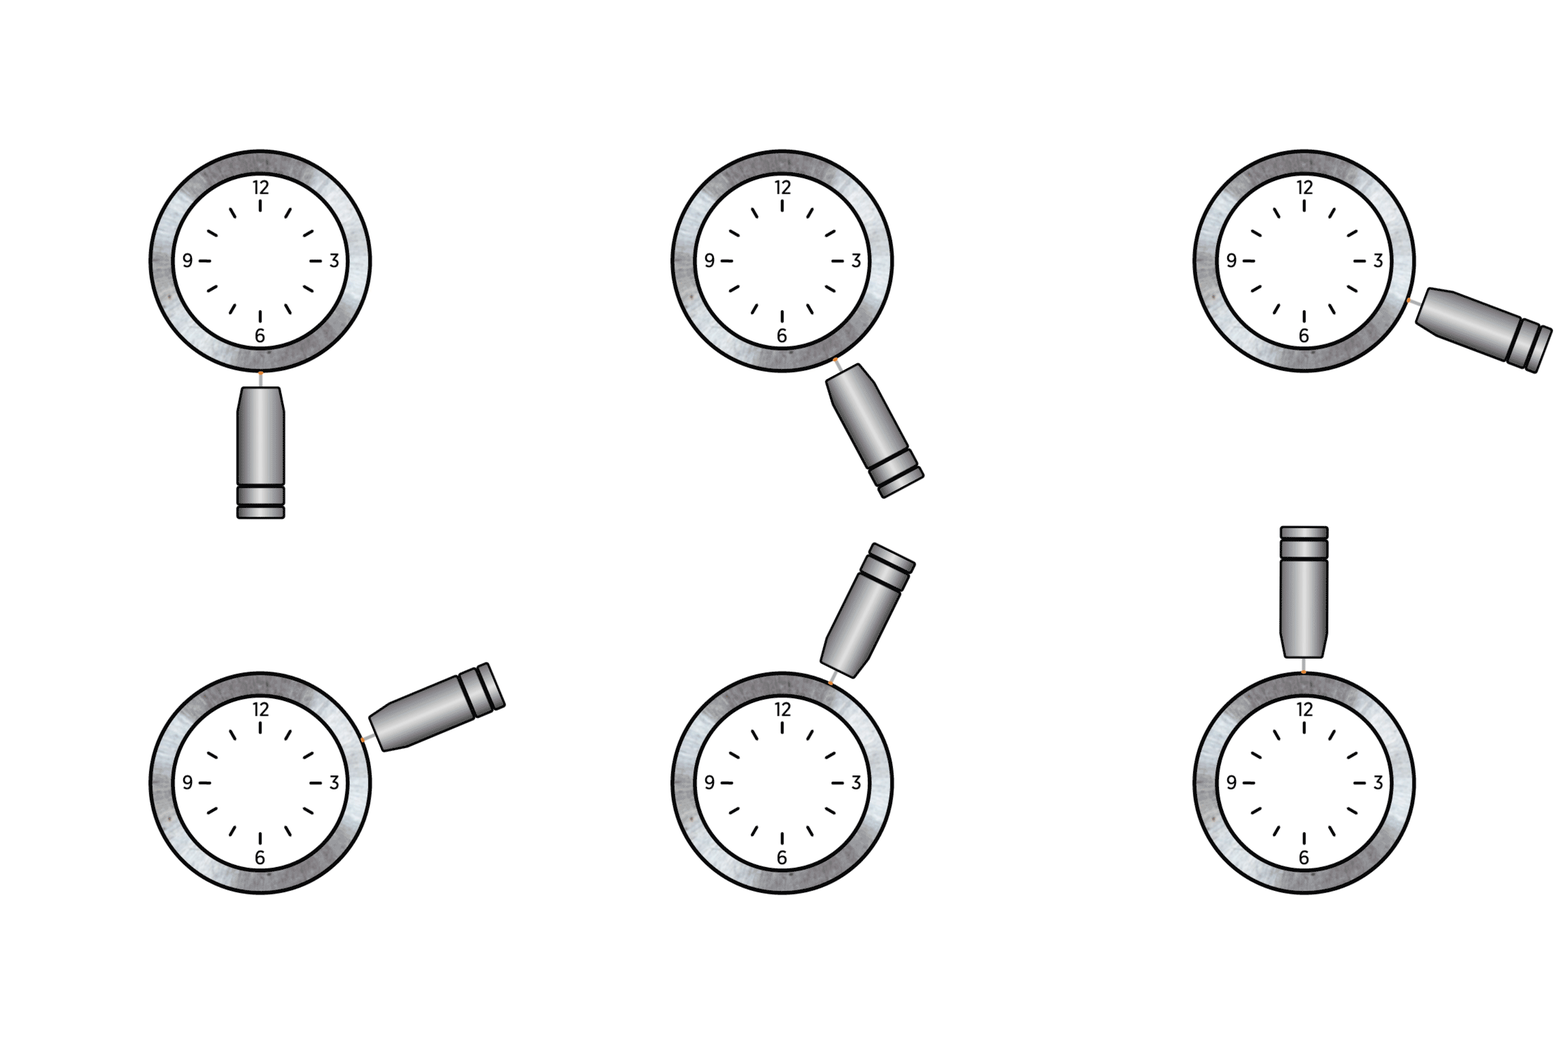
When you weld vertical up on your pipe, you need to watch your torch angle. You want to be working from the bottom of the pipe upwards, right? Let’s think about our pipe as a clock again. You want to start at 6 and work your way up to 12. Your torch should be at roughly a 90° angle to the pipe, give or take. You want to maintain this 90° torch angle all the way up the pipe. Sometimes that means when you’re nearing the top, your arm has chicken winged into the air.

If you don’t move the torch with the weld, you’re going to end up pushing from parallel to the pipe by the time you get to the middle. If you’re flat up against the weld, you’re losing almost all of your shielding gas. Plus, it makes things spray everywhere, and the pool is just harder to control.
Maintaining your torch angle is one reason pipe welding can be so difficult: it’s like a full-body contortion.
MIG Welding
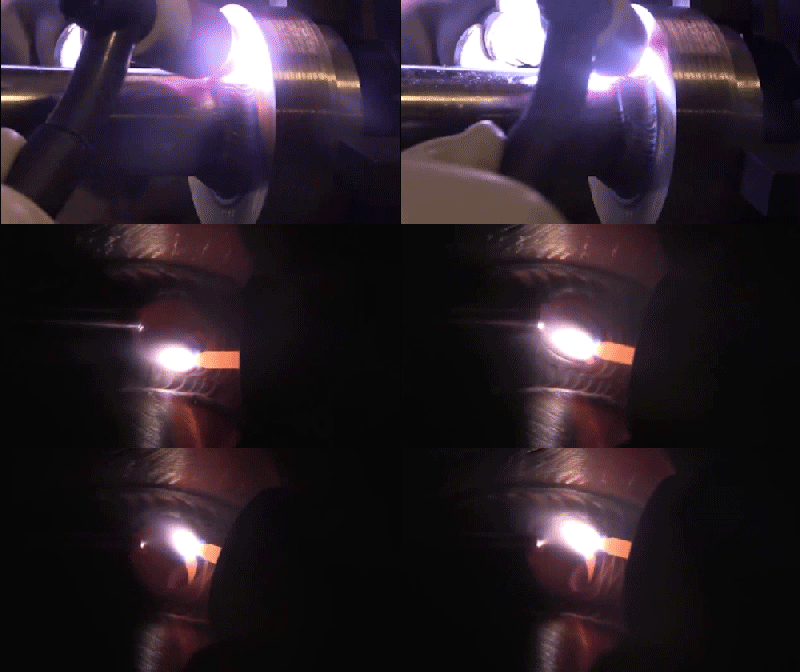
Vertical up can be kind of tricky, even on flat plates, because you’re fighting gravity as you weld. That’s where our zigzag triangle (like a Christmas tree) shape comes in.
By manipulating your torch in a zigzag, you can be sure both sides of the base metal are being melted into. It’s great for your root pass, as it improves the penetration, and you can be pretty sure your weld is going all the way through.
The zigzag also gives you more control over the arc and helps distribute the heat evenly, keeping the filler metal where it’s meant to be.

TIG Welding
Vertical up with TIG isn’t any different to any other position. You’ll still be laying the filler wire into the gap. If your gap is quite wide, you can do a slight weave to melt the rod into both edges.
If you’re TIG welding, you can also ‘walk the cup’. Simply rock your torch in a zigzag motion, diagonally up side to side to walk the cup. It should look as though the sides of your cup are taking a walk, the right side takes a step forward, then the left side, and so on.
While your cup is ‘walking’, your filler rod is held so that it is hovering in the gap and is being melted in by the heat from the electrode. At no point should you dab it in.
You can only walk the cup with TIG, and if you choose to weld your pipe like this, it still needs to be done vertical up.
Stick Welding
Vertical up when stick welding can be hard to control, especially with the wrong settings. Getting your settings right on stick is important for the root run, so you don’t burn through while still getting proper penetration.
Unlike a normal stick weld, you want to push the electrode along the root gap to fill it. You can’t go too crazy with the weld manipulation, as you’ll just trap slag in your weld when it cools. However, you can do a slight weave between the two pieces on your root run if the gap is a bit big.
If you’re running filler beads, just push in a straight line. You’ll need more than one anyway to fill the groove.
Purging
To purge a pipe, you need to block both ends so that air can no longer get in. There are specific rubber purging caps that you can get that come with holes in the centre that allow the purging gas to enter. Otherwise, you can use foil to block your pipe (glad wrap is too weak to hold on), but you’ll need to make your own vents.
The vents are essential for two reasons. First, you need a way to insert the gas hose. Second, once you’ve filled the inside with gas, the excess needs a way to escape. If you don’t leave a space for the excess gas, it’ll make its own, usually in your weld.
Once your pipe is sealed, you can add gas to the inside. This creates an atmosphere inside your pipe that works the same way as your shielding gas on a MIG or TIG torch. It keeps contaminants out and protects the backside of the weld.
Purging is done to keep the inside of the pipe free of oxygen, safe from contaminants and clean. How wide your pipe is and what the pipe will be used for will generally determine whether you need to purge the pipe.
If it’s a small pipe, it doesn’t hurt to purge regardless because you can’t get a file or grinder in to clean the weld up when you’re done, so purging keeps it clean, protected and gives it a weld bead appearance instead.
If your pipe is going into a high pressure or food usage, it needs to be purged to meet the sanitary conditions.
Testing The Weld
If you’ve got spare bits of pipe that you can practice with, that’s great, and you can go ahead and cut a section out to look at the weld. If you’re working onsite, your boss will probably get really upset if you cut open your weld to check it.
If it’s not a critical weld, you can go ahead and eyeball it. For the most part, you can see external defects like porosity. Unfortunately, just checking the outside of your weld isn’t the most reliable, considering you can’t see if there are internal issues. Don’t rely solely on it for important welds (like food and infrastructure).
There are more reliable ways to test a weld, like liquid dyes or an x-ray.
You can get liquid dyes that are sprayed or brushed onto a weld to make surface cracks and other issues visible to the naked eye, that might have otherwise been missed. While it is more reliable, a dye still can’t check the inside of a weld. That’s where an x-ray comes in.
A weld x-ray is pretty much the same thing as going to the doctors and getting an x-ray for a bone. That means it also comes with the potential dangers of a normal x-ray. They’re done by professionals trained to use the equipment, so if you’re working on a project at home, you’re not going to have this option.
Fixing A Weld
If something goes wrong and you end up with a defect somewhere in the weld, there’s good news. You don’t have to get rid of the entire weld. Well, you will if the whole thing has defects.
If only a section of your weld has failed, you only need to remove that part of it. Grab your grinder and grind away the faulty part of the weld. Once it’s been ground out, just redo the weld, remembering to tie it in on both sides. To tie it in properly, it’s not a bad idea to feather out the weld on either side.
