9 Tips & Tricks to Improve Your STICK Welding
May 6, 2021
Stick welding, while not the hardest form of welding to learn, can still be difficult at times. Getting an arc to ignite on the first try is absolutely a skill, and not everyone can do it. Starting an arc isn’t the only tricky part of stick welding, so if you’re looking to improve your welding, give these tips and tricks a try.
1. Current settings
There are two parts to the current settings: polarity and amperage. The good news is that getting the correct settings for both of these is fairly easy, given that they’re listed on the electrode’s packaging.
For example, the HYPERARC 6013 General Purpose electrodes have a recommended polarity of AC & DC+ and a current range of 90A – 130A (for the 3.2mm size).
Why is there more than one option for both? The 6013 GP’s are a more versatile electrode, so they’ll weld well on AC and DC+, which one you use is more of a personal preference. A lot of electrodes will only come with one recommended polarity setting.
In regards to the amperage, every electrode will have a range, as it will run without problems within that range, though you may need to move faster towards the higher end, or if your workpiece metal is thinner, you’ll want the lower end.
How do you know if your amps are wrong?
If you don’t have a high enough amperage, you’ll find the electrode is a lot stickier, and it’ll be difficult to strike an arc without getting stuck to the metal.
Not enough amps also means there’s not enough heat to melt the core wire. Rather than fusing it into the base piece as you weld, it’ll leave little balls of metal on the surface. You’ll also find your arc winks in and out or stutters, regardless of how close you hold your electrode.
On the flip side, if your amps are too high, you’ll find that the weld pool is incredibly fluid and hard to control (but you won’t have issues starting an arc). Too many amps will make your arc louder and will often produce way more spatter as well. It can also cause the electrode to gouge the workpiece without filling it in.
With amperage, a good place to start would be in the middle of the recommended range. If you’re not happy with the way it’s running, adjust your amps by 5-10 either up or down, depending on what is happening with the pool, arc and spatter.
You’ll also need to adjust your amps based on your position; if you’re in an overhead weld, lowering your amps by about 15% will help keep the molten metal in the joint and not on you.
UNIMIG has a guide on which amperage range to use based on workpiece thickness, so check out the free Ultimate Welding Guide.
2. Arc length
Once you’ve started an arc, the key is to maintain it. The best way to keep an arc consistent (and lit) is by holding your electrode a steady distance from the plate. In general, holding it roughly 3mm off the workpiece will give a good arc.
If your arc gets too short, then you’re going to lower your voltage and stick your electrode to the workpiece. If your arc gets too long, your voltage will increase, your puddle will widen, you’ll get more spatter, the metal can spray as the arc isn’t focused, your arc can extinguish, and you’ll also get undercut. Undercut occurs when the weld gets too wide (sometimes because of too many amps) and the base metal melts along the edges, but there is not enough filler material to fill the gap, so you are left with a groove on the toes of the weld.
When you’re first learning to stick weld, keeping your arc tight can be hard, especially considering your electrode is melting away and getting shorter as you go. It can be tricky to adapt to the movement while still making sure your arc doesn’t get longer, but proper arc length is essential.
3. Drag your weld
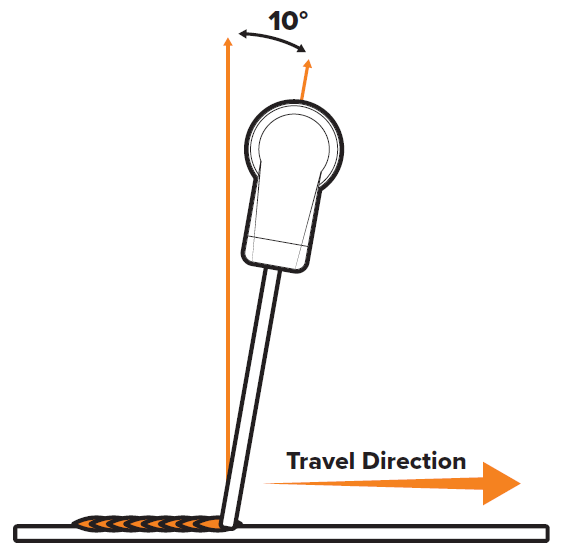
Always pull (or drag) your stick welds. If you try and push your electrode, all you’re going to do is trap the protective slag inside the weld pool, where it will be the opposite of protective. It’ll contaminate your weld instead.
There is only one exception to the drag rule, and that’s when running a vertical up weld. Pushing your weld up a joint is the only time you should ever push your stick weld.

4. Visibility
Just like with any kind of welding, being able to see what you’re doing is super important. How are you going to run your bead in a straight line or watch your arc distance if you can’t see?
Make sure you’re in a comfortable position where you’ll be able to watch what’s happening. Also, keep your face and helmet out of the fumes. Not only do they limit the visibility of your weld, but they’re harmful to breathe as well.
5. Clean, clean, clean
Is stick welding the most forgiving when it comes to cleanliness? Yes. Can you just weld over several millimetres of rust with it? No.
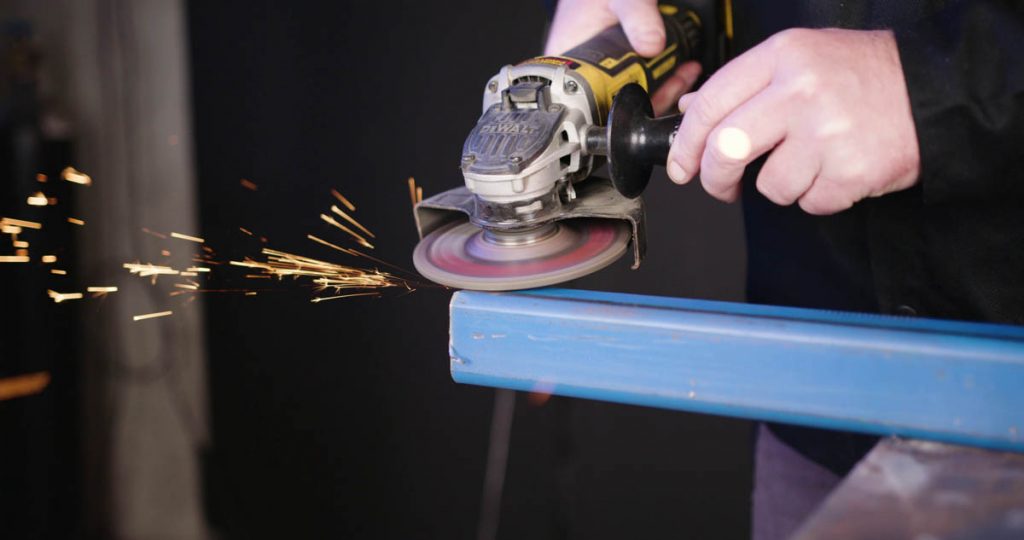
While stick welding is absolutely the most flexible when it comes to surface contaminants, even it has its limit. Cleaning your metal is going to give you the best possible weld, so take a few extra minutes to hit your material with a wire brush or a grinder. If you can’t get everything off, that’s ok, but do slow your travel speed if that’s the case. Going slower will leave more time for the gas bubbles to boil out before the slag forms.
Having clean, bare metal to attach your earth clamp to is also a priority because, without a good grounding, you’re not going to get a good weld.

6. Wet is bad
Generally, electrodes contain some moisture in them, but excessive moisture (or a totally wet electrode) is not good. If you’re using a low hydrogen electrode, then any moisture in your electrodes is a no-no.
If your arc is erratic, wandering or rough, there’s a good chance your electrode isn’t dry. Your flux will also chip off and end up in the weld pool (un-melted) which causes weld defects as well.
There are two ways you can fix this.
The first: prevention. Make sure your electrodes are stored somewhere that is dry and preferably sealed so they stay dry.
The second: an electrode oven. Not to be confused with your kitchen oven. An electrode oven will re-bake the flux coating on an electrode, evaporating any moisture and leaving them ready to weld.
7. Movement

Running a bead with your stick electrode is pretty simple; it’s a steady, straight line. For the same reason you only want to drag a weld, you don’t want to be circling over the back of your weld pool and trapping slag inside.
If your weld joint is too wide for just a single bead, make a second, third, or however many passes you need in order to properly fill it. These will all be straight lines, with a 50/50 overlap of the filler and base metal to fuse them together.
Once again, the only exception to this rule is a vertical up weld. You can rock slightly side to side so that the electrode tip makes contact with both sides of the weld joint. Don’t hover over the middle, as it will take care of itself; you just want to ensure that the bead penetrates the corner properly and you don’t get any undercut on the edges.
8. Speed
A good travel speed is a consistent one. It’s also one that doesn’t burn through your plate or leave your bead sitting on top of the metal instead of melted into it. How can you tell if you’re too fast or too slow?
If you’re moving too fast, you’ll end up with a narrow, high bead that looks like it’s sitting above the metal. That’s because it is, as there wasn’t enough time to heat the workpiece and electrode to have it melt in.
If you’re moving too slow, your puddle will get wider, but the build-up will also be higher, and you’ll have shallow penetration. That’s because instead of melting down, your puddle goes sideways instead, so you get a fat bead with no extra penetration.
9. Dry runs
Doing a test run for any weld is a good habit to pick up, but it’s especially good for stick welding.
It’s definitely better to find out before you start welding that your elbow is going to bang into the table or another corner or anything as your electrode melts.
Making sure you can move down with your electrode, and you won’t be obstructed means you won’t need any unnecessary restarts halfway through your joint because you suddenly realised you had to reposition.
You always want to be comfortable before starting your weld, and doing a dry run will ensure that you can stay comfortable.