How to TIG Sheet Metal for a Perfect Weld
May 6, 2021
When you’re trying to weld sheet metal, there’s one main enemy: heat. To get a good weld and avoid warpage or blowouts, you need to keep as much heat out of your base metal as possible.
Thanks to its ability to weld effectively at low amps, TIG welding is a great option when it comes to sheet metal.
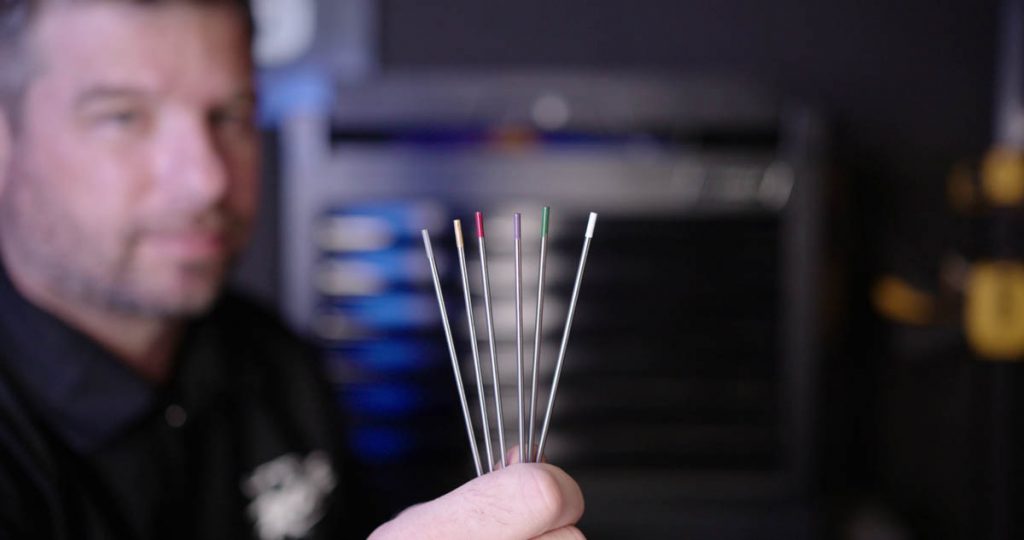
Tungsten Selection and Prep
First things first, tungsten selection and prep. At UNIMIG, we recommend the gold-tipped Lanthanated tungstens for mild steel, but you can use any of the others that work with steel (e.g. Ceriated and Thoriated) as well.
Though tungsten type is more down to personal preference, your tungsten diameter needs to be small.
A 1.6mm tungsten is going to be your best bet on really thin sheet metal, but if you’re working on something closer to 3mm, you can use a 2.4mm tungsten. A small tungsten needs fewer amps to fully heat, and the lower the amps, the better.
Using lower amps does mean that you’ll need to move slower, as it takes more time to melt, so sometimes it might be better to switch methods. Go for a slightly bigger tungsten, up the amps and pick up the pace.
Running hot but fast means the metal melts faster, without having to linger in the one spot for as long, keeping the actual heat levels lower. If you’re not confident in being able to maintain a faster pace though, stick to a smaller tungsten, lower amps and a speed you’re comfortable with.
Regardless of the application, your tungsten needs to be prepped, and sheet metal is no different.
If you’re working with stainless or mild steel, you’ll want to grind the end to a sharp point (grinding lengthways on your grinding wheel!) to get the best results.
A pointed tip helps keep your arc and puddle as fine and controlled as possible, which is key to keeping your HAZ (heat affected zone) narrow.
If you’re working with aluminium, a balled or flattened point on the tungsten is needed.
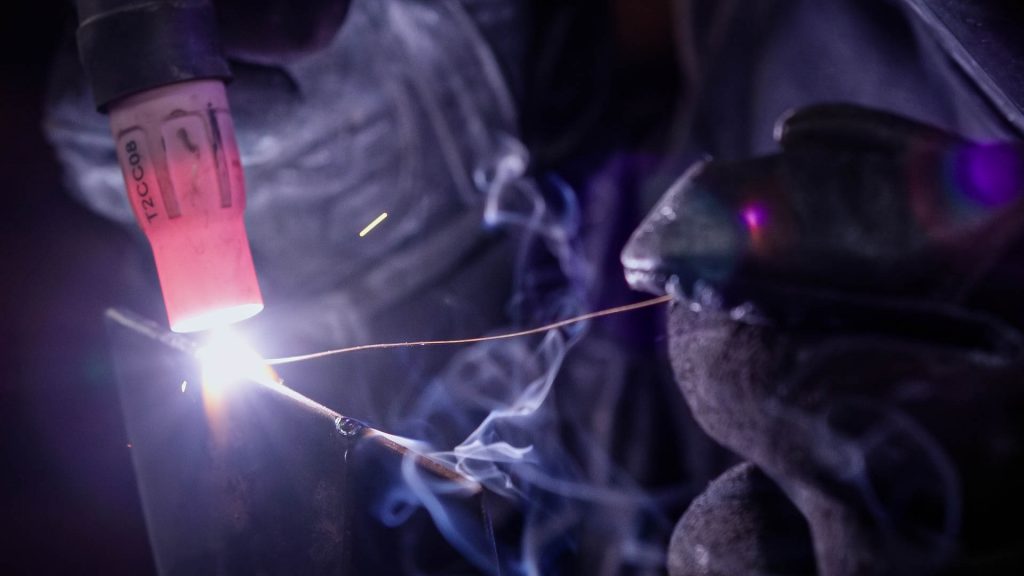
Filler Metals
Your filler metal thickness is super important when it comes to working on sheet metal. You want your filler to be melting before or at the same time as your base metal.
If you have a filler rod that’s too thick (like using a 2.4mm rod on 1mm metal), then you’ll need more time and heat to get it to melt, which is a big no-no.
When you’re working on super thin sheet metal, you can use MIG wire as a filler rod. All you have to do is cut some off from the spool (being careful not to unravel the whole thing) and straighten it out.
Straightening the MIG wire so that it’s easier to feed through your fingers is probably the hardest thing about using it as filler for TIG.
Using MIG wire is a good option for the really thin stuff because you can get a lot smaller diameter wire than TIG rods. The smallest rod available is 1.6mm, whereas you can get 0.6mm MIG wire.
The thinner the filler you use, the easier it is to melt, and the smaller your bead will be. Just make sure if you’re welding 2mm-3mm sheet metal that you aren’t using 0.6mm wire – you still need enough metal to join the two pieces with proper penetration.
Settings
Most TIG welding on sheet metal can be done at fairly low amps. If you’re not sure where to start, check out UNIMIG’s free Ultimate Welding Guide.
It includes a full list of settings based on tungsten, filler and base metal thicknesses. Our guide is just a starting point, so if you need to fine-tune it for the best result, go ahead.
Getting yourself a foot pedal so you can increase and decrease the amp level as needed can also be really helpful.
Metal Prep
When you’re TIG welding sheet metal, you don’t want there to be any gap. You want your two pieces to be flush, and it’s a good idea to have it clamped at regular intervals while you do the tacks so that one side can’t lift or overlap onto the other.
Having a good and proper metal fit-up can save you a lot of time later. The better the fit-up, the less issues you’ll have to face when it comes to blowing out.
Keep in mind that you’re still working with TIG, so make sure your metal is spick and span, and there’s no rust, dirt, coating or otherwise on your metal when you start.
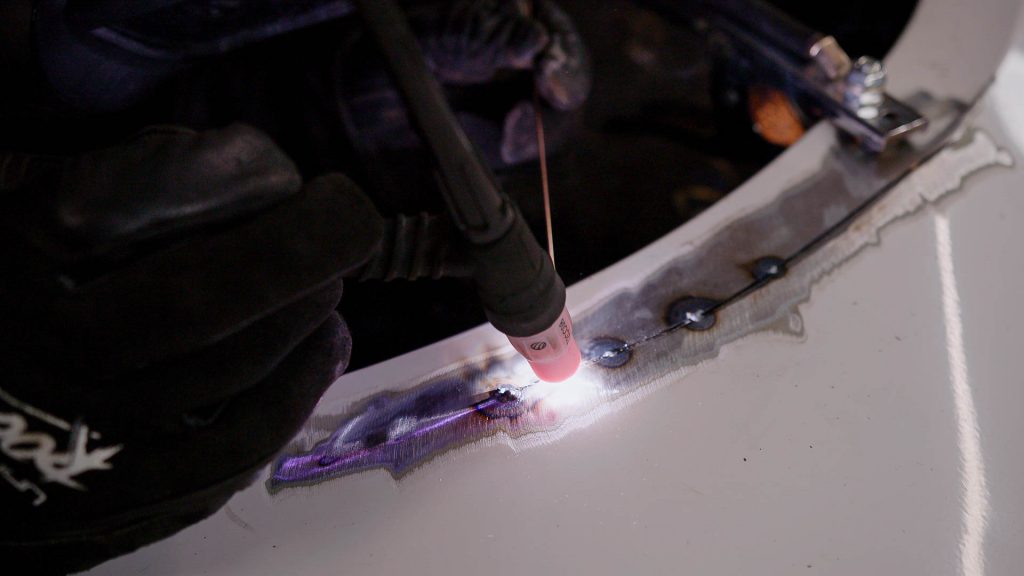
Tack Everything
Once you’re set up and ready, with your metal clamped into place, you can start your welding. TIG welding sheet metal is a lot like TIG welding any other kind of metal, with only a few changes to technique.
The first thing you want to do that’s different is your tacks.
You want a lot of tacks. Like, a lot. Making regular tacks, roughly every 5mm-10mm seems like overkill, but it’ll keep everything where it’s meant to be once you start properly welding.
If your tacks are too far apart, you’ll find that your metal sheets begin to pull away from each other and leave a gap that you’ll need to fill. Or one side could rise higher than the other, even beginning to overlap (if you’re working on a butt weld), which needs to be corrected.
As time-consuming as it may be, having close together tacks helps stop all of that from happening.
When you’re making the tacks, you want to add as little filler rod as possible. You’re almost aiming for more of a fusion weld.
That way, when you go back over the top of them for the actual joining weld, there isn’t just a big lump of metal in the way that you have to work around.
When you weld the metal together, you don’t have to skip the tacks. Instead, you weld straight over the top of them to avoid leaving a gap, so the flatter they are to start with, the better.
Once you’ve done your tacks, you can hammer and dolly all of them to remove any warpage. That way, when you start the final weld, you’ll still be working on a flat piece of metal.
After you’ve finished all your tacks and the metal’s cooled down again (which shouldn’t take long), you can go in for the final weld.
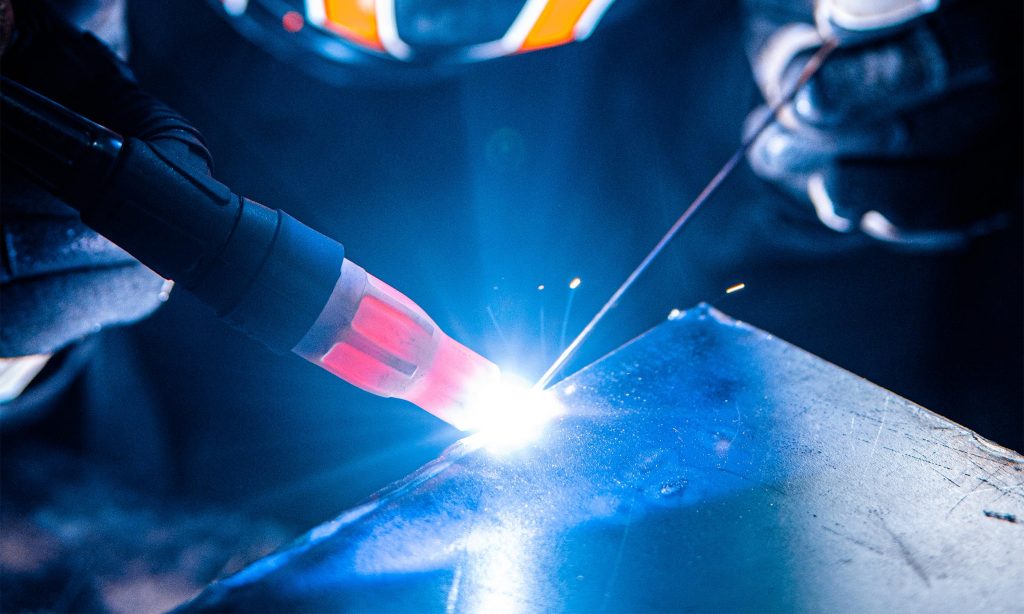
Making The Weld
TIG doesn’t put as much initial heat into the metal if it’s running at a much lower temperature, so in theory, and if you’ve got the skill level and confidence, you can run a weld without stopping across the length of an entire car panel.
If you were to do that, your weld speed and filler dabs have to be pretty much the exact same the whole way. If you’re still getting familiar with TIG or you’re just not super confident about your travel speed consistency, you can just weld small distances and jump around the panel.
But you can absolutely go for longer periods of welding than MIG. You’re not confined to only making small stitch welds for fear of blowing straight through the metal.

For example, if you’ve placed your tacks every 10mm, you could go along the span of five of them and cover a good 5cm before you stop. You don’t have to do these longer welds, and often you can feel the metal start to move or warp as you go after only a few centimetres.
Each time you feel or see the metal move, you can pause your weld, use a hammer and dolly to flatten it back out, and then restart.
Doing these shorter welds and adjusting the warpage (hammering it flat) as you go is a slower process, but it means that half your post weld work is being done during the weld instead.
You can also stagger your TIG welds instead of running along the metal in one straight line. Start your weld at one end, do your stitch weld, then jump to the other end, then come back again, alternating back and forth to join in the middle.
In general, though, TIG welding sheet metal can be done like TIG welding any other metal. Get your amps going, stick to a consistent travel speed and dab, dab, dab.
If the fit-up is tight (and thin) enough, you don’t even need filler, but you should keep it on hand to add if needed. For example, if the weld was opening up and widening, you could add a dab to cool it back down and close any gap that may have been forming.
You can, if you have a machine that is capable of it, use a pulse TIG setting on your sheet metal. Using pulse TIG helps to minimise how much heat is being put into the metal as the amps decrease and then increase (back to your set amps) at your chosen rate.
It can also help stop any blowouts that might happen, as the metal has brief moments to cool in the ‘off’ or decreased amps part of the pulse cycle.
Quick tip: The tighter you keep the arc, the fewer amps you’ll need to properly melt your filler because the heat is more concentrated. It means you can travel faster and keep your metal cooler overall. The downside to a tight arc is obviously the closer to the base metal you get, the higher the chance of dipping your tungsten into the base metal or with the filler wire.
When you stop a weld, you need to restart about 5mm back along the top of the previous weld. Wait for the puddle to form again and then continue along on the next part of the weld.
You restart like this to keep the integrity of the weld and so that there’s no little gaps or holes between any of them. Holes allow moisture to sneak in, and moisture in your metal will lead to rust down the track.
Warpage
Even though TIG can run at a much lower amp rate than MIG, you’re still going to get some warping. Warpage happens no matter what, though sheet metal is much more prone to it because you’re adding heat to thin metal. It’s just a matter of how much you can limit warping.
There are a couple of ways to help cool your metal faster. One is by blowing compressed air on it, and the other is by putting cold water over it. Neither of these will cool the metal instantly, but they will speed the process up.
Thanks to being unable to totally stop warpage, being able to go over it with a dolly and body hammer is one way to flatten your metal back out. This is possible with a TIG weld (and only on sheet metal), as it’s a softer weld, so it doesn’t crack under the hammering.
If you make your welding process as consistent as possible, when you go back in to correct the warpage, it’ll only need consistent hammering instead of light and heavy hammering to accommodate the different levels of warpage.
Blowouts
If you accidentally blow through your metal, don’t worry; you won’t have to start again. To fix a blowout, you just need to fill it back in, so start by slightly lowering your amps.
To fill the hole, begin from the outer edge and work your way in, dabbing filler as you go until you’ve reached the centre. Once you’ve filled the hole back in, you can just grind or sand it back to flush with the rest of the metal like you would with a normal weld.
TIG welding is usually used on the thinner sections of sheet metal as it’s more controlled, there’s no spatter, you can see what you’re doing better, and you can get a cleaner fit. Also, you can hammer and dolly it as you go because the weld is softer. However, it is a slower process than MIG and can be pretty time consuming if you’ve got a large panel to weld, so you’ll have to be patient.