How to Weld Aluminium
May 6, 2021
Aluminium is one of the more common materials used to weld with, with a few properties that make it unique compared to steel and stainless. It’s soft, so it’s easy to work on and machine, it’s non-magnetic, it’s pretty resistant to rust and corrosion, and it doesn’t spark. That’s why its main use is on aeroplanes and boats. Obviously, making a plane might be a bit of a stretch if you’re welding at home for fun, but you could absolutely build your own boat in your backyard once you had the hang of it.
Quick Navigation
Jump to:
Metal Grades
There are a few types of aluminium filler wire, but the most common ones you can get are 4043 and 5356. Both of these fillers are aluminium alloys, with 4043 containing 5% silicon and 5356 containing 5% magnesium.
- 4043: use on 4000 to 6000 series aluminium
- 5356: use on 3000, 5000 & 6000 series aluminium

These different alloys give the filler wires different characteristics, the most notable being that 4043 is softer than 5356. 5356 wire is generally preferred for this reason when MIG welding, as it tends to feed better because of that little bit of extra hardness. However, if you’re welding a 4000 series aluminium, you’ll have to use 4043 filler.
Hot Shortness
Aluminium is ‘hot short’, which means that it’s prone to cracking when it’s close to its melting point. Basically, as the weld cools, aluminium is more likely to crack. It usually starts where the weld has ended and will often spread down the entire length of the weld. Cracks in your weld are bad news, and you’ll need to redo it because they’re structurally weak.
Metal Preparation
When it comes to aluminium, preparation is super important. Aluminium is not forgiving at all; anything left on it will mess up your weld.
Any dirt, paint, oil or otherwise needs to be completely removed, and that’s just the first part of cleaning it. Aluminium also has a layer of oxide on it which needs to be cleaned off.
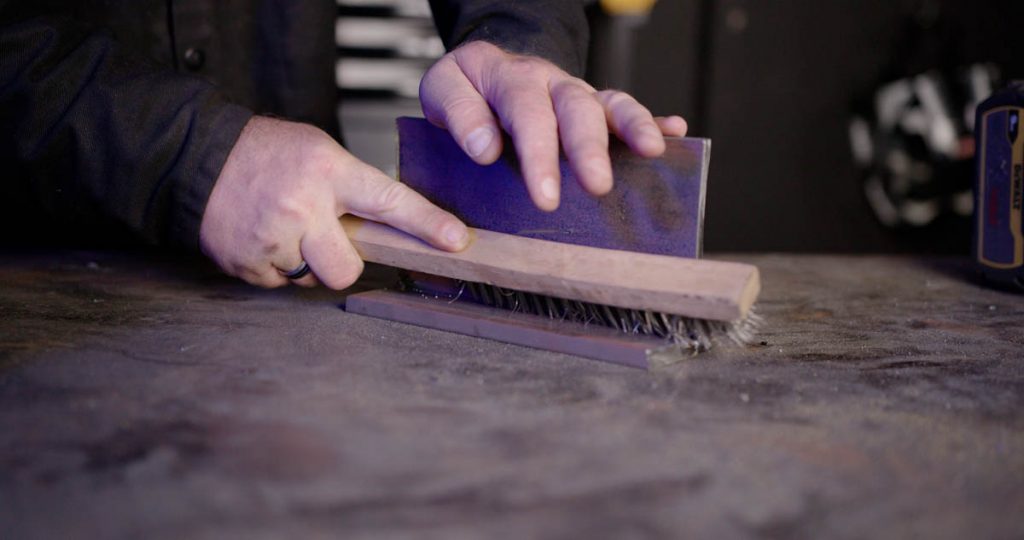
There are a few ways that you can clean off this oxide layer. The first is with a handheld wire brush. Select a brush that you can dedicate to aluminium only because using a brush that you’ve previously used on steel or stainless can contaminate the aluminium.
You want to brush until it’s dull and lost its shine. It shouldn’t be shiny because that’s usually an indication that there’s still an outer layer on the metal.
Using a wire brush wheel or anything similar is a big no-no because aluminium is soft. It won’t clean the oxide off; it’ll just embed it into the metal further because of the high speed of the wheel heating the metal up.
If you’re using a wire brush, make sure to only scrub in one direction, as brushing back and forth can also imbed the oxide further into the aluminium.
The second way you can clean aluminium is with isopropyl alcohol or acetone. It’s a good idea to give your metal a wipe down before you hit it with a wire brush, just to ensure there’s nothing on the surface that’s going to get embedded accidentally.
Keep in mind that you don’t need to go too crazy with the cleaning because no matter how well you try to clean this off, it’s never going to be perfect.
Aluminium immediately begins to reform its oxide layer when oxygen touches it, so once you’ve wiped and/or wire brushed it, let your welder do the rest because you’re never going to get ALL of it off.
If you’re TIG welding aluminium, giving your filler rod a quick wipe down doesn’t hurt either.
It sounds like a hassle, but cleaning your aluminium thoroughly is critical because of the metal’s melting points. The arc will still ignite even if the metal is dirty or still has its oxide layer. However, if you leave too much of the oxide layer on the aluminium, you might not be able to start a weld pool.
Aluminium melts at around 660°C, but the oxide layer on top melts at about 2000°C. What that means is that you could be melting the aluminium that’s underneath the surface layer, but you won’t actually be able to start a weld pool until you burn through the oxide.
MIG Welding Aluminium
MIG welding aluminium can be a lot faster than using TIG, and you can stick to your standard DC settings, so you won’t need a machine with AC/DC capabilities.
However, welding aluminium on MIG is like ‘pushing a wet noodle through a straw’ if you’re using the standard torch. It is possible, but it can be really hard and incredibly frustrating.
Aluminium is a softer metal than steel and stainless, so trying to feed it through a torch lead becomes much more difficult because it bends easier.
There are a few ways to combat this with your MIG torch.
The first thing you’ll need to do is replace your liner with a Teflon one, as they’re designed for aluminium, which you’ll attach a neck spring to. While you’re changing the liner, switch out your guide tube to an aluminium designed one as well.
You’ll need to make sure you’ve got U-groove rollers, as these will grip the aluminium better and help stop birdnesting. Lastly, you can get aluminium specific contact tips, which will also help with the wire feeding.
The second thing to do is try and keep your torch as straight as possible when you’re welding. The shorter torch you have, the easier this is (and the shorter the travel distance for the aluminium), but it does get tricky if you have a 3 or more metre torch. Big loose curves or loops can be ok, but any tight circles are almost definitely going to kink your wire.
You’ll also need a separate gas bottle. Unlike steel and stainless MIG welding (which uses an ArCO2 mix), aluminium needs pure argon gas. If you’re not going to be welding aluminium a huge amount, then a small bottle will work fine.
You load an aluminium spool in the MIG welder the same way you would for steel and stainless, by lining up the locating lug and hole, slotting the spool into place and screwing the nut on to lock it in. Once it’s on, you can feed the start of the wire into the inlet guide, over the roller and into the beginning of the guide tube.
Sometimes this will work, but you must have the correct setup. Otherwise, you’re going to run into birdnesting.
What to do if your wire keeps birdnesting
What exactly is a birdnest anyway? What does it look it? Great questions.
A birdnest in your wire happens at the drive rollers. It occurs when the rollers are pushing the wire through the torch, but somewhere along the line it’s being stopped, so it’s not coming out the end of your torch.
The wire’s still being pushed, though, so it has to go somewhere. That somewhere is all around your drivers, where it tangles and loops over itself and looks a bit like a loose bird nest.
There are a few things you can check if your wire does birdnest, but even if you check everything, it might not work.
Change your liner
Let’s go back to our ‘wet noodle in a straw’ idea. You want your straw to be as hospitable to your noodle as you can make it. To do that, you’ve installed a new Teflon liner into your torch, which you’ve done for two reasons. One, it’s slipperier and offers less resistance against the aluminium. Two, pushing your aluminium through a liner that’s had steel in it can contaminate it.
Make sure you keep your straw as straight as possible. If you think about those crazy curly straws you got as a kid, there’s no chance a wet noodle would push through that, regardless of how slippery it is.
That’s why it’s super important your torch stays straight, and you also don’t accidentally kink it in your hands while you’re moving around. Even if you can’t see it, the liner in the torch will hold some of those small bends itself even if the torch isn’t bent.
When you change your liner, if you were inserting a steel one, you’d cut off any excess that hung out the end of the torch tip. Aluminium is different (of course). Once you’ve threaded your Teflon liner through the torch, don’t cut anything off the back, you want to keep that excess. It’s going to feed into the new guide tube you’re about to insert into the machine.
Change your guide tube
You can use some long nose pliers (or something else that will reach) to remove that steel guide tube. When the torch is unplugged, you can reach into the hole on the front of the machine to grab it.
Replace this with a guide tube made specifically for aluminium (you’ll need to cut it to size, so use the steel one you removed for the correct measurement).
You can then feed the excess Teflon liner into the new guide tube when you reconnect the torch. If your Teflon liner sticks out further than the tube and over the drive rollers, then you would cut that bit off. The liner should be flush with the guide tube.
This guide tube and liner will stop the aluminium wire from vibrating around freely in the 6cm or so between the end of the steel guide tube and the beginning of the torch liner, which is one of the biggest causes of birdnesting.
Check your consumables
Once your spool is in and the wire is threaded through the drive rollers (which you’ve swapped to U-grooves), you can hold down your torch button and feed it through.
Make sure you take your nozzle and contact tip off the torch first because you don’t want the wire to hit them and get stuck, as that would cause a birdnest in the machine.
Keep in mind that your liner, rollers, and contact tip should all match your wire’s size (e.g. 1mm wire needs 1mm sized consumables). Mismatched sizing will also cause issues because of aluminium’s softness.
That’s why aluminium specific consumables are the best to use; they’re drilled just a bit bigger to accommodate for the fact that the wire swells with the heat.
A lot of the time, you’ll be able to run the wire all the way through the lead and out the tip without issues. It’s once you put your tip and nozzle back on and try to weld with it that you start seeing problems.
Check your tensions
If your torch is straight and you fed your wire through without a contact tip, but when you tried to weld it failed, check the tension on your wire.
You can have more tension on a steel or stainless wire than you can on aluminium, and too much can flatten or deform your wire. Be careful not to loosen it too much, as not enough tension means the drivers will just spin and not push. (Getting all these things just right can be a bit of a juggling act; trial and error is the main way to find what works best for you.)
Now you’ve fixed the tension on your wire, fed the wire back through the torch, no problems there. You’re ready to weld. Your wire birdnests again. This is usually the point people start pulling their hair out at, but there’s one last thing you can check to try and fix the problem.
The tension on the spool’s lock nut. This is (again) a bit of a spin the knob until you get it right kind of deal. Too much pressure on your spool means the drivers have to work extra hard to pull the wire and make it spin.
On the other hand, not enough pressure and the wire will unravel on the spool and be impossible to feed. You can adjust this pressure by loosening or tightening the nut that holds the spool in place.
UNIMIG sells an aluminium kit that contains an aluminium liner, neck spring, drive roller, guide tube and contact tips. You can get everything you need for a standard MIG torch in one place, all in one go.
If your wire birdnests again, and you’ve exhausted all of these options, it might be time to try out a spool gun instead. Life will be much, much easier if you purchase a spool gun.
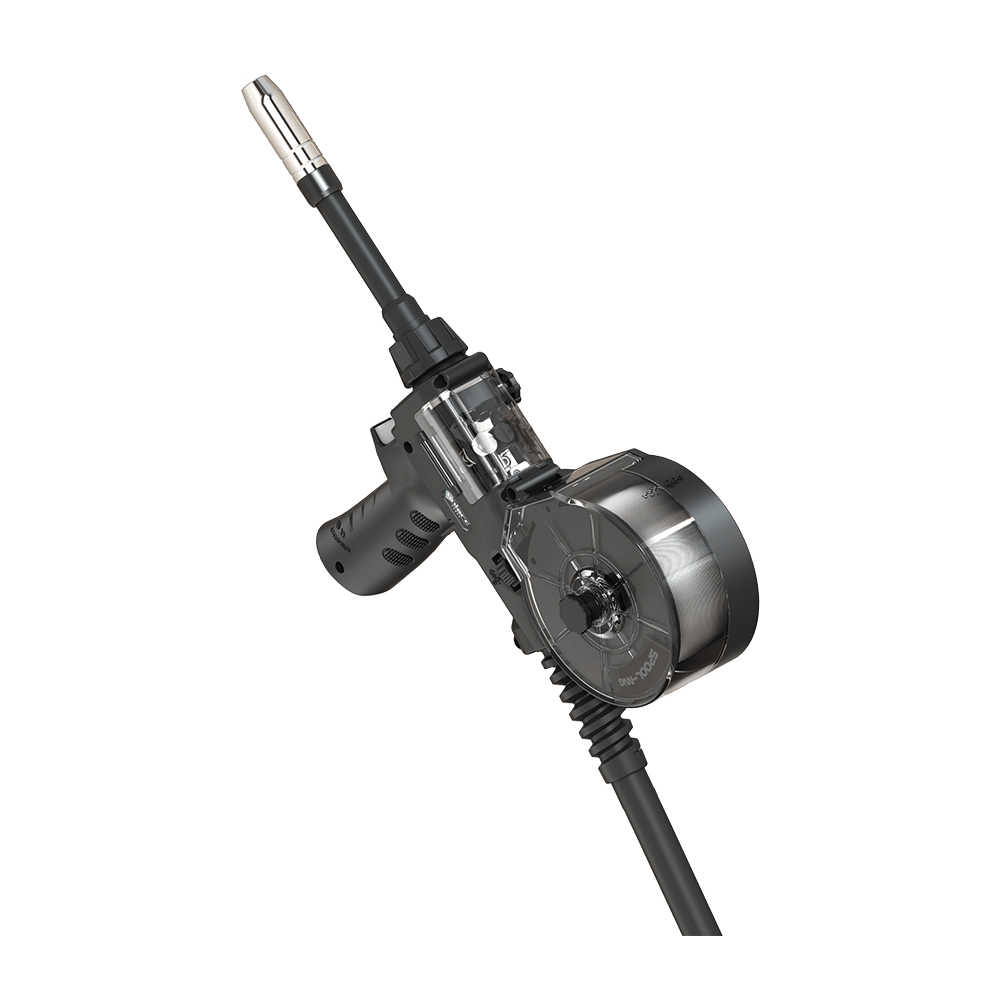
Spool gun
Spool guns were designed specifically for welding aluminium. Instead of feeding your wire through a long torch lead, the spool holder is attached to the gun, reducing your travel distance from 4-metres to roughly 30cm. It also includes a small wire drive inside, which feeds the wire through. There’s no fiddling around with the correct liner or straightening your torch; you can lock your spool in and be ready to go in just a few minutes.
Setting up your spool gun is relatively simple, and most of the process is pretty similar to setting up your standard MIG torch.
Keep in mind that when you detach your MIG torch, if you have a steel or stainless spool already loaded inside, you’ll need to cut it behind the inlet guide and hook it in the roll or tape it down. You’ll then need to pull all the wire still in the torch out.
Once you’ve removed your MIG torch, you can attach your spool gun. UNIMIG spool guns have a Euro connection, so they plug into your machine just like your MIG torch does.
The next step is to attach your wire spool. This, again, is done pretty much the same way as with a normal torch:
- Unscrew the nut and lift the plastic casing off
- Release the spool brake
- Slide your spool onto the shaft
- Feed the first part of the wire through the inlet guide (found at the bottom) and between the drive rollers
- Reapply the spool brake
- Put the plastic casing back on and re-screw the nut
Spool guns are pre-loaded with U-groove rollers, but just remember that if you change your filler wire thickness, you might need to change those rollers to match.
There is one additional step for a spool gun, and that’s making sure to flick the switch on the machine to ‘spool gun’. Now you can hold the trigger and feed the wire through.
You’ll still need to take off your nozzle and contact tip so the wire doesn’t catch, but at least you don’t have to wait for it to fill 4 metres of torch.
Even though the setup is the same, welding aluminium with a spool gun requires a bit of a different technique to get it right. You’ll need to increase your travel speed.
With increased travel speed comes increased wire feeding speed, which means turning your voltage up. Your wire feed and voltage still need to work together.
Because you’re adding more wire into the weld, to get a proper weld and not just have little blobs on the surface, you’ll need to move across the joint faster than you would with steel. Aluminium is also incredibly heat absorbent, which is another reason you’ll need to up your pace.
UNIMIG machines come with a setup guide inside the door, which includes recommended settings for aluminium. It’s not a bad idea to start with lower volts than what is recommended (if it recommended 13V, then try 11V) so you can make sure they’re right, but also so you can get an eye for what too low does look like.
If your voltage is too low, the wire will make little round balls or globs (because it’s not melting properly) at the tip and fall into the weld, rather than looking like it’s flowing steadily.
Tips for your aluminium MIG weld
1. Use the right technique
One of the most important things for getting a good aluminium weld is your angle. Aluminium should always be pushed. (Anything with gas should be pushed.)
If you pull (or drag) your aluminium weld, you can trap the contaminants inside the weld puddle, resulting in a poor-quality weld. Plus, you won’t get any penetration if you pull it.
However, if you push, the argon gas can properly shield the molten weld pool and keep it clean.

2. Thoroughly clean your metal
MIG welding aluminium is naturally a dirtier process than TIG welding it and a thin layer of black soot on the weld is normal, as well as a bit of spatter, but too much soot is a problem.
Cleaning your aluminium thoroughly and making sure it is spick and span is just as crucial on MIG as it is for TIG.
3. Get the gas flow right
One of the things that will affect how black the weld is is the travel angle and the gas. In general, a higher gas flow is recommended for aluminium in comparison to steel. If you’re getting a lot of black soot, try turning your gas up first, with your gun at roughly a 5° to 10° pushing angle.
Don’t go too crazy with the gas though, you’re not going to be able to get rid of all the soot no matter how high it is, and too much gas will give you an erratic arc. Plus, it’s wasteful.
If your gas flow is quite high and you’re pushing but still getting soot, check that the gas itself isn’t contaminated (yes, that can happen) or that there aren’t any places in the torch that oxygen is getting in.
4. Fill in the ends
When you finish an aluminium weld, you’re often left with a crater or ‘fisheye’ at the end. This looks like a round dent, and it can cause a few issues if it isn’t filled in.
To fill it in, when you reach the end of your weld, pull your torch back into the puddle and let it bubble before you release the trigger.
The other way to fill it is by dashing it a few times. When you reach the end of your weld, release the trigger for a half-second, and then press it quickly, as if you were adding tacks, onto the end of the joint to fill it.
If you leave your crater unfilled, you may find that your weld cracks after some time. This is especially true for any welding done to trailers or anything that’s subject to constant vibration.
The crater is the weakest part of the weld, so when put under too much pressure, or constant vibration, it can crack. The crack can spread all the way down your weld, even if the rest of it was structurally sound.
When you end a weld, whether you’re making tacks or running a joint, your aluminium wire will usually form a small ball. You’ll need to cut this off before you start your next weld.
MIG welding aluminium can be tricky, and it’s not nearly as good looking as a TIG weld, but it’s a lot faster, so it’s usually more preferred for a lot of production work. It does depend on your material thickness as well. 2mm thick base metal is about as thin as you can get with MIG; any thinner and you’ll need to TIG it.
TIG Welding Aluminium
TIG welding aluminium is arguably harder, but there are more options to play with that will affect (and probably improve) the weld than there are with MIG. It’s definitely a slower process feeding the wire in by hand yourself, but you can get finer, nicer looking welds with it.
As with all TIG welding, the first thing you need to do is choose and prepare your tungsten.
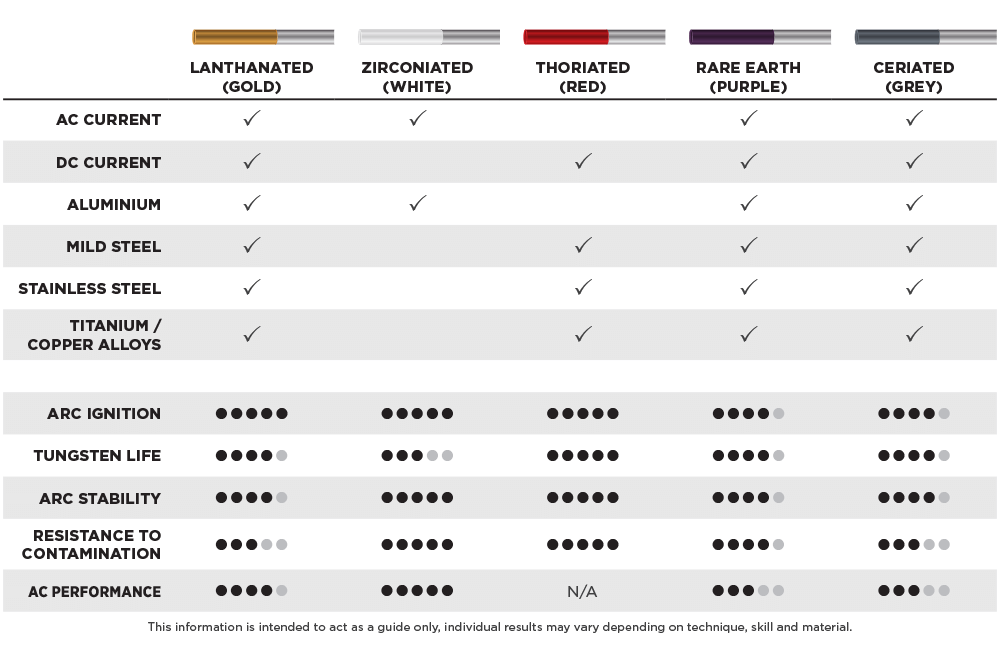
So, which tungsten should you choose? You can technically use any tungsten that can run on AC (Lanthanated, Zirconiated, Ceriated and rare earth). Depending on who you ask, you’ll get a different answer, but we recommend Zirconiated for its arc stability and AC performance.
Now that you’ve picked a tungsten, you’ll need to prepare it for the weld. The rule used to be that if you were welding aluminium, you’d need to ball the tip of your tungsten (mostly because operators used to mainly use a pure tungsten).
Every machine used to be a transformer machine, and these, paired with pure tungsten, would mean that to prepare the tungsten, you held it over a piece of copper (in AC) at a high amperage until the tip had formed a ball.
These days, with improved technology, TIG machines are now almost always inverter machines, which means that you can prep your tungsten how you would for a steel weld, by grinding it to a point.
A pointed tip will give the arc more focus, but when in AC will still cause your tungsten to ball naturally. The ball in these instances will be nowhere near as big as what would’ve appeared on a pure tungsten and generally doesn’t affect the weld very much.
You can influence how much your tungsten tip balls by changing your amps and AC balance settings.
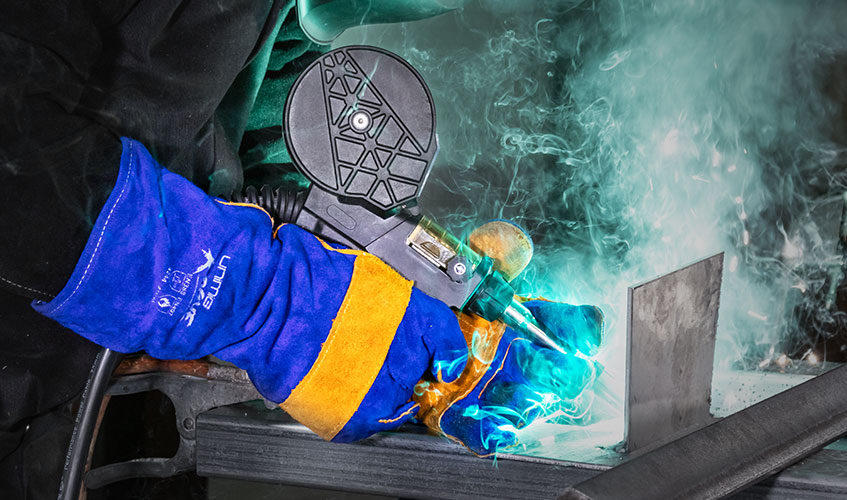
Unlike MIG, welding aluminium with TIG is always done in AC. There’s one main reason for this, and that’s because the AC cleans off the oxide layer as it welds. But how does it do it?
AC Balance
AC stands for Alternating Current. When you’re using DC, you can choose if you’re using a negative or positive current. In AC, you get both. It flows between negative and positive in a ‘cycle’.
You can, however, choose how much time will be spent in positive and how much time will be spent in negative. This is your AC balance.
The positive and negative currents have their own properties, which is why some welds may require different percentages of positive to negative.
The positive part of an AC cycle is what cleans the metal, and the negative part is what provides the heat and penetration for the weld.
In general, if you’ve pre-cleaned your metal, a 30% positive to 70% negative ratio will work pretty well. The setting varies between machines, but it should either say ‘balance’, ‘%’ or have an image of a square wave on it, which will indicate that you can adjust the balance.
Increasing your positive percentage will increase the cleaning on your workpiece. However, the more you up your cleaning, the less penetration you’re going to have. You pretty much never want a 50/50 balance, as you won’t have enough heat to actually make a weld pool.
Besides your lack of penetration, upping your cleaning means you spend longer in the positive part of your AC cycle. The longer you spend in the positive, the hotter your tungsten gets.
This heat, however, does not get transferred into the metal. Instead, it sits inside the tungsten, which results in your tungsten balling and then melting entirely. If your tungsten starts melting, there’s a good chance part of it is going to end up in your weld pool, which will contaminate it.
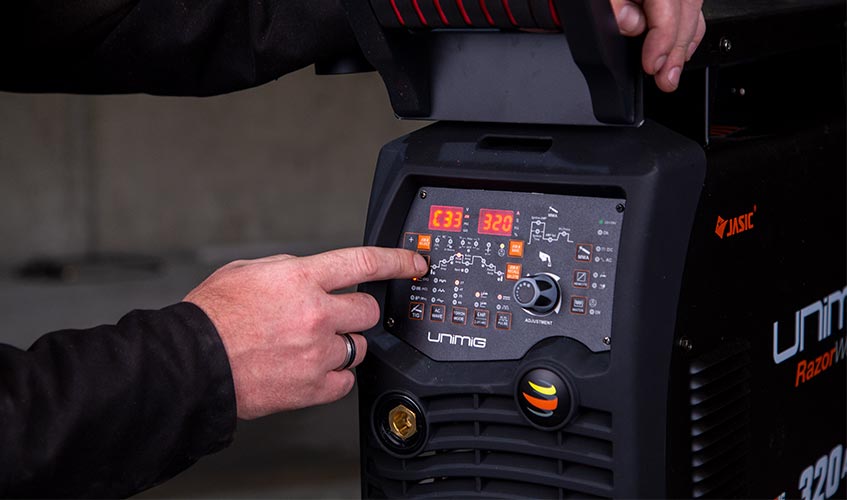
At UNIMIG, every one of our dedicated TIG welders comes with the ability to adjust the AC balance (except the RAZOR TIG 220 DC Welder, as that can’t run AC).
When using any of our machines set to AC or AC pulse, you can scroll through using the knob to the ‘AC Balance’ setting, which has a picture of a square wave.
UNIMIG TIG welders are partly synergic, in that once you’ve programmed in the tungsten electrode size and your amps, it will automatically select what it believes to be the best balance setting for your weld. However, if you find that you’re not getting enough cleaning or penetration, you can manually adjust it.
When you scroll through to the setting, the machine will read 0, which is what the machine has selected. You can change this up to +5 and down to -5, with negative numbers meaning less cleaning (and more penetration) and positive numbers meaning more cleaning (and less penetration).
AC Frequency
The AC balance is not the only setting that affects your weld. The frequency of your cycle also plays a role in how your weld is going to turn out. While your balance determines how long you spend in the positive and negative currents per cycle, your frequency will determine how many cycles are completed per second.
Older machines won’t let you change this at all and are generally set to a standard 60Hz per second. However, with newer technology, you now have the option to increase or decrease your frequency as well.
Turning your frequency up and down will change your weld profile and the sound that the machine makes. UNIMIG TIG machines have a frequency range of 20-200, and this can be adjusted by scrolling through to the ‘AC Hertz’ setting.
The higher the frequency, the more cycles per second, which creates a thinner, more prominent weld appearance as the arc becomes smaller and more focused. The lower your frequency, the flatter your weld will be.
A higher frequency is usually recommended for thinner metals, as the arc is tighter, so you can be more accurate in thin joints (like outside corners).
The higher your frequency, the higher the pitch of your weld, so if you’re welding with 200Hz all day, investing in earplugs will be a lifesaver.
Tips for your aluminium TIG weld
The actual process of TIG welding aluminium is basically the exact same as TIG welding steel or stainless. Start your arc, form a weld pool and feed in your filler rod. There are, however, some things that are different.
1. Get a foot pedal
Being able to control your amps is really helpful for making a good aluminium weld. While you can program in start amps, up slope, peak amps, down slope and finish amps, using a foot pedal is probably the easiest way to weld aluminium.
You may need to fluctuate your amps in the middle of the weld, which isn’t really possible with just a torch. Aluminium heats up fast, so easing off from your peak amps halfway through the weld can help with distortion and melting through to the other side.
The foot pedal means you can ease up slower at the end of your weld and cool the metal down gradually. This, plus your post flow, is critical to stopping your weld from cracking because of aluminium’s ‘hot shortness’. A pedal also lets you start cooler and clean the start of your weld for longer.

2. Make sure the cleaning is happening
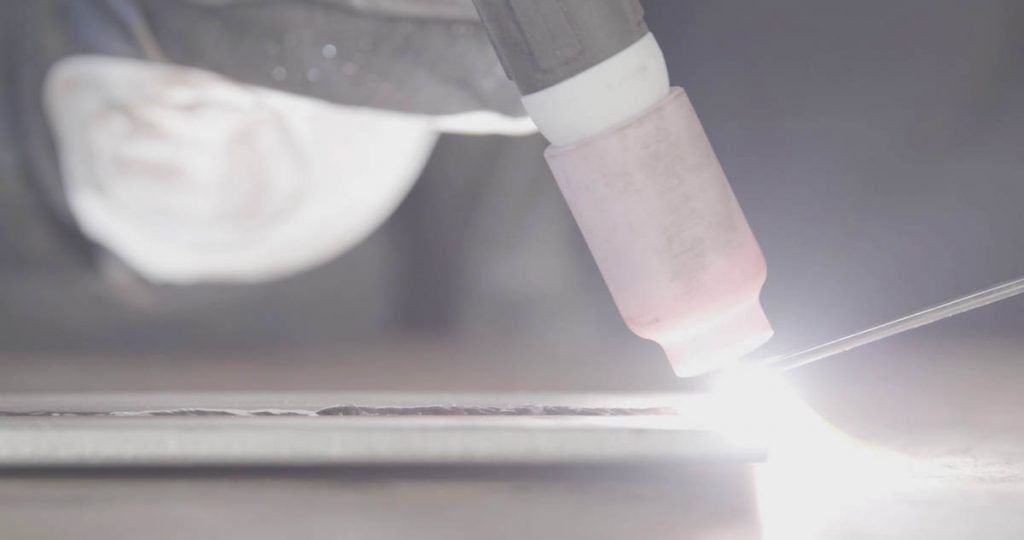
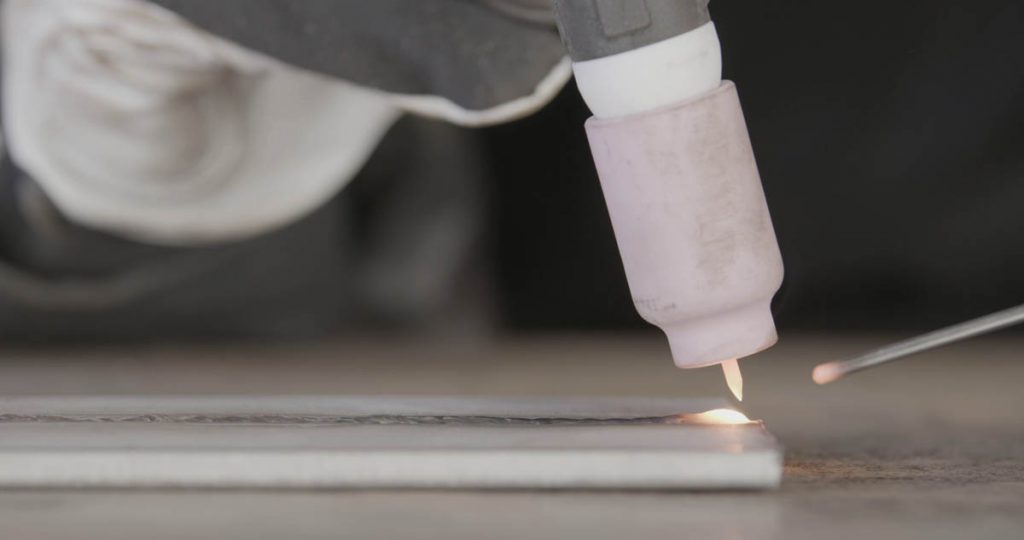
You can see the cleaning happening when you begin a weld, as the top oxide layer almost looks like snow melting off the ground as the metal heats up.
This cleaning continues all the way along your weld, so you’ll find when you’re done that there’ll be an outer edge of white around your weld bead. This frosty look is the oxide layer that’s been cleaned from your weld by the AC.
It’s a good sign and gets wider or narrower depending on your AC balance. It can be cleaned off at the end of your weld with a wire brush with no issues.
3. Let the puddle form
You will need to wait until the weld puddle has fully formed and you have a shiny pool before you begin adding your filler metal. Because of the cleaning action that happens at the start, it may take some time. Give your weld a few seconds to form a proper puddle before you start dabbing in filler.
4. Watch the heat
Like MIG welding, you’ll generally need to move along the joint faster than you would with steel. If your metal is getting too hot and you have a foot pedal, then you can back off your amps a bit to help bring the heat back down.
Otherwise, you can add more filler, or dab more frequently, to keep cool the weld. The colder filler rod helps to bring the overall temperature down.
5. Finish strong, not harsh
Once you reach the end of your weld, as well as easing off your amps slowly to prevent cracking, you can also add some extra filler metal to fill in the crater that would otherwise form. If you’re using a torch, setting your finish amps lower than your peak is recommended; you don’t need to keep your amps full blast on the edge of your metal.
Troubleshooting Your Aluminium Welds
Is your metal clean?
One of the main things that will affect your weld is how clean your workpiece is. This is probably the most crucial step, and most issues can be resolved by giving it a more thorough clean.
Things like excessive black soot (when MIG welding), porosity, black floaties, peppering in the weld and ‘skin’ (think of the layer that forms on tomato soup that’s been left out) can usually all be fixed by going back to step one and giving the metal a good clean.
Check your gas
If you’re getting a thick ring of black soot around your bead when MIG welding and your aluminium is as clean as you can get it, then it’s most likely a gas problem.
The first thing to check is whether or not you’re using the right gas. You should be using pure argon. Try turning the flow rate on your gas bottle up and see if that helps, as you might not be getting enough coverage.
If that doesn’t help, your gas might be contaminated, or there could be a leak. If it’s contaminated gas, then you’ll need a whole new cylinder. If your gas hose is leaky, then you’ll need to replace it.
It’s pretty unlikely you’ll completely eliminate the soot, but a thin ring typically means that the gas is cleaning contaminants and blowing them out of the way of your weld, so the actual joint will be fine.
Maintain your contact tips
While we’re on common problems you get when MIG welding, let’s talk about contact tips. Whether you’re using a standard torch or a spool gun, you should expect to go through a few contact tips.
Because aluminium absorbs heat faster and you need to move along the weld faster, you need to increase your wire speed to match. The problem is if you don’t have enough wire speed or your volts are too high, the filler wire burns back.
It’s called burnback, and this is how far the wire recedes when you stop welding. If your wire does burn back onto the contact tip, it can ruin it, and you’ll need to replace it to keep welding.
Fill the ends
Whether you’re MIG or TIG welding, fisheyes in the crater at the end of the weld are not good. In both cases, you want to add more filler wire to fill in the crater. You should also leave your torch over the weld so that it remains shielded by your gas until it has fully cooled to prevent cracking afterwards.
How thick is the parent metal?
Your parent metal’s thickness is also going to play a role in how well your weld comes out.
If it’s too thick and you’re MIG welding, there’s a good chance your filler wire is now sitting on top of the joint rather than inside it.
If you’re TIG welding, you might not be able to even start a weld pool because the torch can’t get enough heat into the metal.
Make sure you’ve got a machine that’s got enough amps for your material’s thickness. You can also try preheating (more on this later), but that’s not always guaranteed to work.
Another trick you can try is using an argon/helium mixed gas. Pure argon is generally recommended, but adding helium to your gas will give you more heat if you need just that bit more penetration. It’s like turning your 200 amp machine into a 250 amp machine.
Tungsten choice
There are a number of things that can go wrong with a weld that are TIG specific.
Using the wrong tungsten size is relatively common, as you generally need to go up in tungsten size for aluminium compared to steel.
For example, say you’ve got a machine that goes up to 120 amps max, and you’re welding steel on DC. You can put a 1.6mm tungsten in your torch and crank the amps all the way up to 120, and that’s fine; your tungsten can handle it with no problems (120A is usually about the max for a 1.6mm tungsten, though).
However, if you were to use that same tungsten at 120 amps on AC, it’s a totally different story. Because the current flows in two directions, rather than just one, it makes it much harder for the tungsten to cope.
Your tungsten will start balling, melting, splitting and otherwise. It will break down. Technically, you can still weld with it in this condition, but your arc will be super erratic, and there’s a good chance the tip of your tungsten ends up in the weld pool, contaminating it.
There is a super easy fix to this problem, though, and that’s upgrading to the next size tungsten. If 1.6mm can’t handle it, grab a 2.4mm instead.
Don’t use a 50/50 balance
The next thing that can go wrong is your settings, specifically your AC balance. A 50/50 cleaning to penetration does sound like it would be the optimal settings. The best of both worlds, right? Wrong.
Too much time on the cleaning part of the AC cycle can seriously harm your weld, and in most cases, actually makes it dirtier. The contaminants it’s trying to remove often get stuck on the surface of the weld, and you end up with the peppered effect.
Too much of the positive current in AC also makes your tungsten ball really quickly, so you might find your arc starts to wander halfway along the joint. That’s because your nice sharp point (which you started with on an inverter machine) has now turned into a fat circle that’s not concentrating your arc. Turn the cleaning down, add some more penetration, and you’ll be good to go.
Tungsten contamination
Like regular TIG welding, tungsten contamination is another thing that could be affecting your weld.
When you get filler metal on your tungsten while welding steel, it can be pretty obvious; the arc starts sputtering and becomes unstable. The same goes for aluminium.
Once the aluminium is on there, the arc starts wandering. Some of the common symptoms of tungsten contamination are globulars (your filler sits on top of the metal, rather than fuses with it), black soot, a wandering arc or your puddle doesn’t flow.
Unfortunately, if your tungsten does get contaminated, you can’t just grind it off because aluminium camouflages very well on tungstens, and even if it looks clean, it might not be.
Instead, you’ll need to break the end off. To do this, you can snap it off against a sharp edge, or you can use a grinder to cut it. You’ll need to break it in one quick motion, as tungsten has the tendency to splinter if you break it slowly.
Once the contaminated tip has been removed, you can regrind it into shape and start again.
Storage
Aluminium has to be stored correctly, as it can become contaminated if not, which will affect your weld quality.
Placing it in a dry, clean space is your best option, preferably at a consistent room temperature. If aluminium is stored somewhere cold and then is moved into room temperature or a warmer area, it can cause condensation on the metal. Moisture on your filler metal, whether it’s 4043, 5356, a MIG spool or a TIG rod, is going to give you a bad weld.
Placing the filler back in its original packaging will help protect it against dirt and other bits, and only handling it with gloves will keep the natural oils from contaminating it as well.
Preheat
Preheating for thicker pieces is a good idea, especially if your voltage or amperage is already pretty high. Just take a propane torch and put some heat into the metal as evenly as you can.
You don’t want it to be melting, but it helps with penetration if your metal already has some heat in it, rather than going from a cold start. If you do preheat your metal, doing a quick test run is recommended, as you’ll need to be moving faster if your metal is already hot.
Welding aluminium takes a bit more juggling compared to stainless and mild steel. Practice runs on scrap metal are going to be your best friend while you learn. Even if it takes you a few tries, don’t worry, it’s a hard metal to work with.